
Installing S-Filer Portal
S-Filer Portal consists of three components:
- The server
- The gateway
- The command line interface (CLI)
Server and Gateway can be installed in console mode or in graphic mode. Typically, the console mode is used in a UNIX environment, while the graphic mode is used in the Windows world. The installation procedures of these two components are very similar. The administrator simply needs to specify the basic configuration through a series of questions. Once completed the installation of components, it is always possible to reconfigure the installation settings. Each component once installed can uninstall just as easy. The installation of web applications (war file) are as simple and mainly involve copying the files in the right places on the target system.
System configurations
When running in a Linux environment, you need to make sure the fontconfig and libfontconfig.so.1 package are installed because they are required by java and not included in OpenJDK 11 and is required to display the Captcha and for all the reports. This applies for both the Server and the Gateway.
You can run the following commands with yum or rpm to verify if they are installed.
yum list installed fontconfigor
rpm -qa \| grep fontconfigFor example, if your distribution supports yum, you could use the following commands to install them.
yum install fontconfig
yum install libfontconfig.so.1
Package content
The customer receives in their S-Filer Support community the appropriate package for their environment.
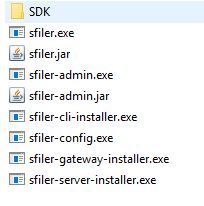
New installations
Windows
The Server
This chapter introduces you to the S-Filer Portal Server installation as well as basic configuration. Before starting, it is recommended to print the Check List supplied in Annexe 1 at the end of this document and fill each field as you install.
The S-Filer / Portal server is the main component. This is the first component to install.
You can launch the installer by clicking directly on the executable sfiler-server-installer.exe. For Windows Core versions you can use the -i console parameter on the command line: sfiler-server-installer.exe -i console.
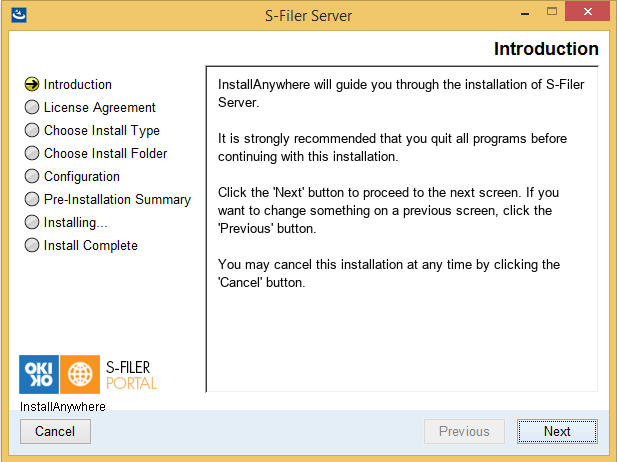
After launching the installer, it prompts you to close all applications running to eliminate all sources of conflict. Once all applications are closed, you must click on the Next button to proceed to the next step.
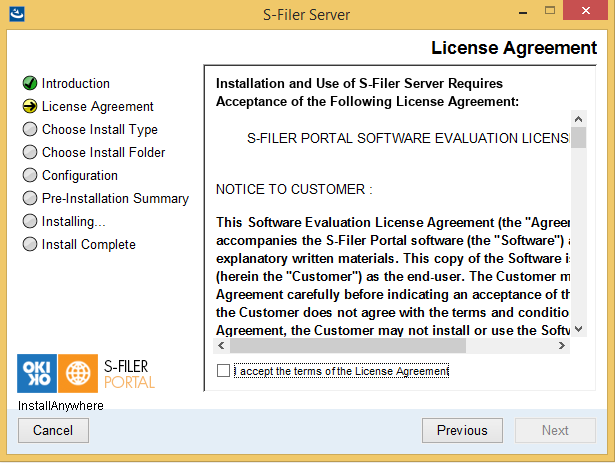
You are then prompted to read and accept the license to use the product S-Filer Portal. To accept the license, you must press the Next button. If you would like more information about the license, please contact your technical support.
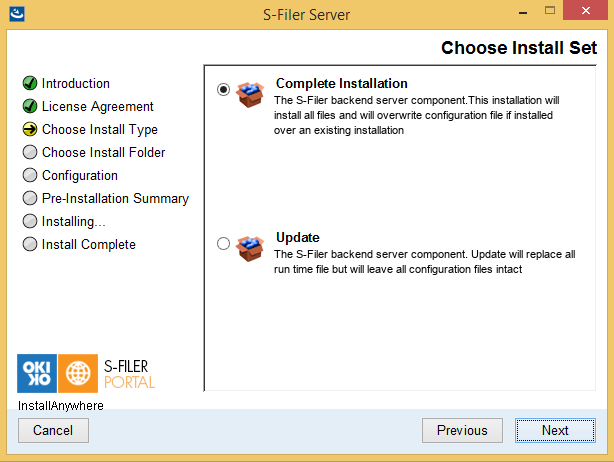
Once you have accepted the license, you must select the installation type. A "Complete Installation" will install all the required components and configuration files. If you are installing S-Filer for the first time, please select this option. An ''Update'' will upgrade your existing S-Filer installation with the new features and leave your configuration files intact.
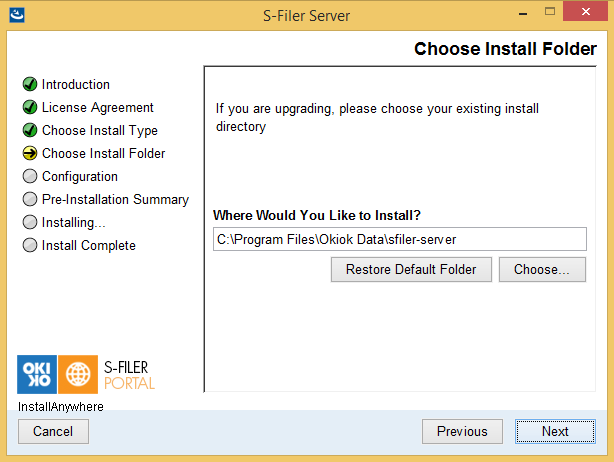
Next, you must enter the destination directory. You can browse your file system using the Choose button. Once the directory is specified, press the Next button to proceed to the next step. In the event you wish to return to the default location, simply click the Restore Default Folder button.
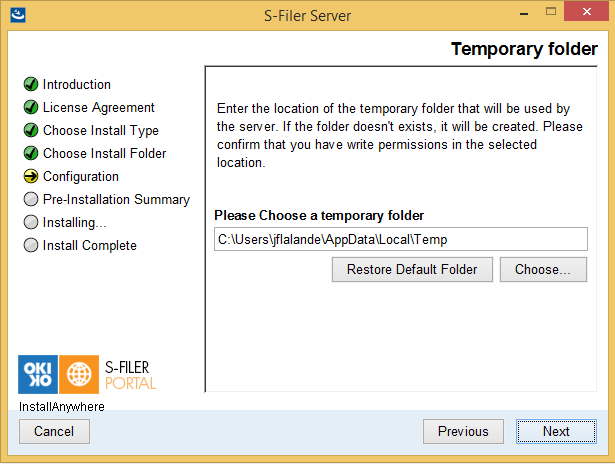
Finally, you must choose a temporary folder that will be used the server. If the folder does not exist, it will be created during the installation. Make sure that you have write permission on the selected location.
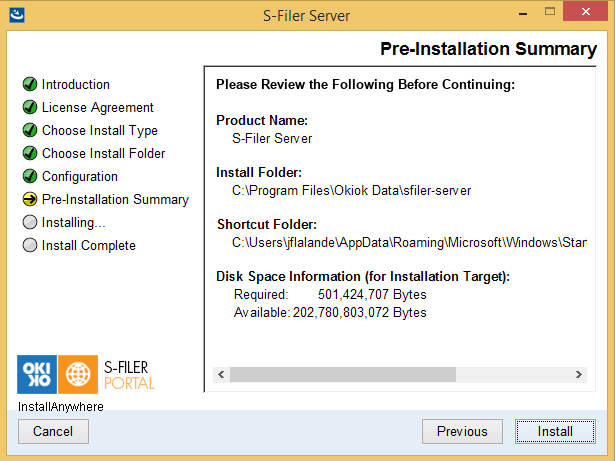
One must now validate the parameters of the installer before it starts copying files to the target system. If the parameters are valid, click the Install button to continue the installation.
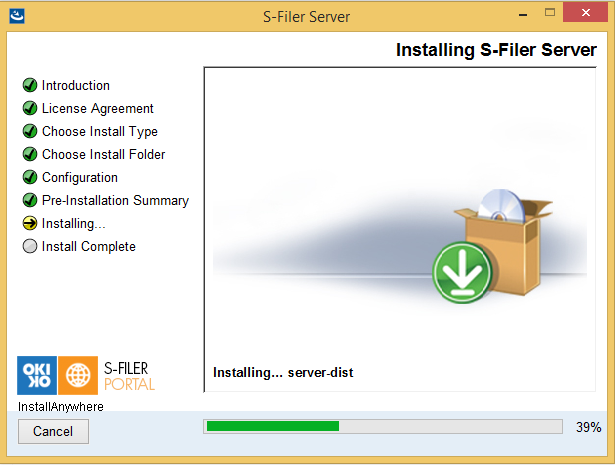
You can follow the progress of the installation via the progress bar at the bottom of the window. To avoid any potential problems, S-Filer / Portal installs its own JRE (Java Runtime Environment).
At the end of the installation, if everything went well, a message appears indicating that the installation is completed. If an error occurs during the installation, note the error and contact technical support.
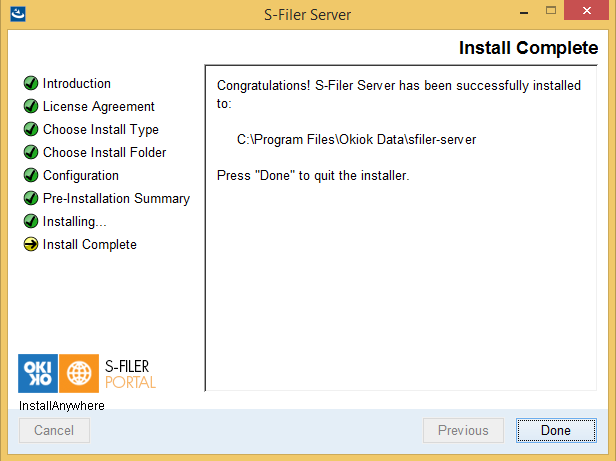
The installation is complete.
The Gateway
S-Filer Portal Gateway allows you to extend transfer protocols. Without this component, file transfers are reserved only to the HTTP protocol. With this gateway, it becomes possible to extend the S-Filer / Portal to use with FTP, FTPS and SFTP protocols. The gateway is a component that is usually installed in a Demilitarize Zone (DMZ).
This chapter introduces you to the S-Filer Portal Gateway installation as well as basic configuration.
The customer receives in their S-Filer Support community the appropriate package for their environment.
You can launch the installer by clicking directly on the executable sfiler-gateway-installer.exe. For Windows Core versions you can use the -i console parameter on the command line: sfiler-gateway-installer.exe -i console
After launching the installer, it prompts you to close all applications running to eliminate all sources of conflict. Once all applications are closed, you must click on the Next button to proceed to the next step.
You are then prompted to read and accept the license to use the product S-Filer Portal. To accept the license, you must press the Next button. If you would like more information about the license, please contact your technical support.
Once you have accepted the license, you must select the installation type. A "Complete Installation" will install all the required components and configuration files. If you are installing S-Filer for the first time, please select this option. An ''Update'' will upgrade your existing S-Filer installation with new features and leave your configuration files intact.
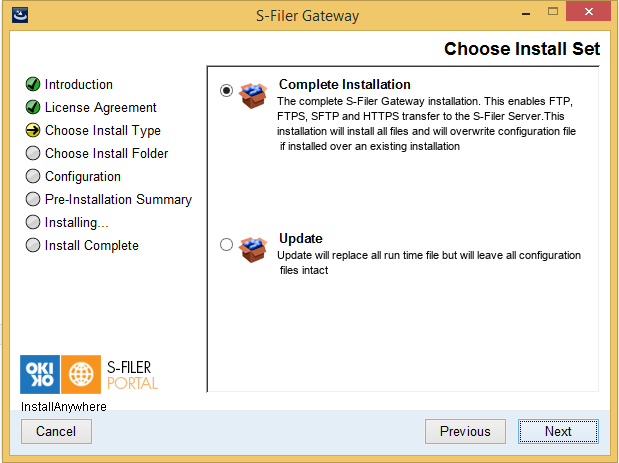
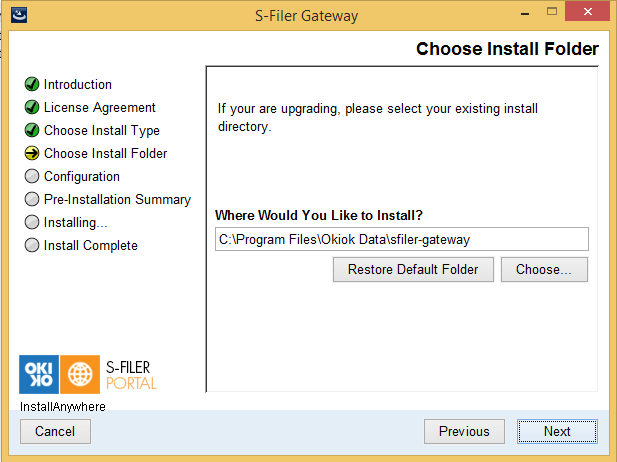
Next, you must enter the destination directory. You can browse your file system using the Choose button. Once the directory is specified, press the Next button to proceed to the next step. In the event you wish to return to the default location, simply click the Restore Default Folder button.
Finally, you must choose a temporary folder that will be used the gateway. If the folder does not exist, it will be created during the installation.
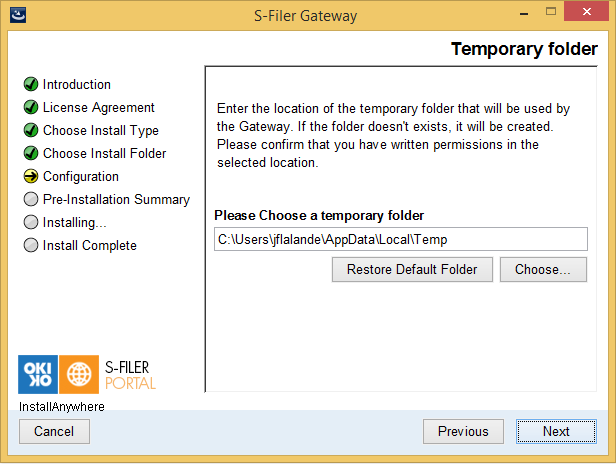
The next step is simply to validate the installation. If all parameters are valid, click the Install button to start the installation of the Gateway.
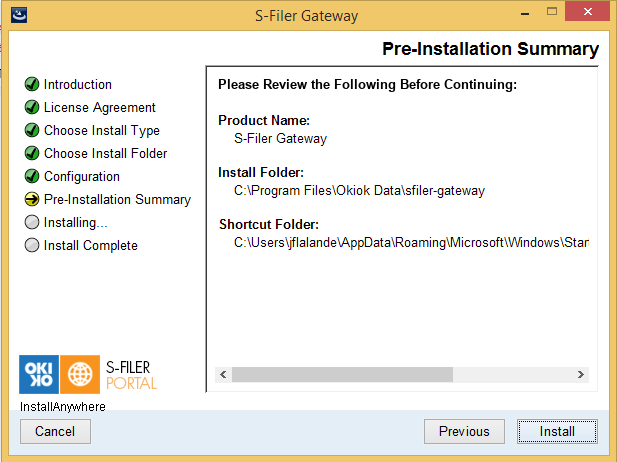
You can follow the progress of the installation via the progress bar at the bottom of the window. To avoid any potential problems, S-Filer / Portal installs its own JRE (Java Runtime Environment).
At the end of the installation, if everything went well, a message appears indicating that the installation is complete. If an error occurs during installation, note the error, and contact technical support.
Once the installation process has completed, it is time to process with the Basic Configuration importation. These are the files that you should recover from the Administrative Console. It is now required to move those files in the "gateway" folder of the S-Filer Gateway installation. To proceed with the importation, you need to open a DOS Prompt in the S-Filer Gateway installation folder. In this folder, you now have a new command line utility called the sfiler-config-cli. Run the command with the arguments that matches your installation specificities:
sfiler-config-cli.bat set-basic-config -bcdf [instance-name]-conf-gateway.txt -scf conf/sfiler.conf.templateRepeat the same operation for the Web Interface:
sfiler-config-cli.bat set-basic-config -bcdf [instance-name]-conf-gateway.txt -scf conf/gui.conf.templateThat last operation completes the installation procedure for the S-Filer Gateway. You can take some time to validate that the properties of the conf/sfiler.conf.template and conf/gui.conf.template files are filled. If that is not the case, consider looking at the sfiler-config-cli logs located in the /logs folder.
Installing a customer graphical theme
If a customer-specific graphical theme was provided for your deployment, it is installed on the Gateway. Gateway themes live under .../sfiler-gateway/gateway/webapps/sfiler-gui-ajax/themes, next to the default sfiler theme. Copy the customer theme folder into that directory, then restart the Gateway service so that the new theme is served.
See Also
For details on building and customizing a theme (logos, login page, CSS, notification messages), see the Customization Guide.
The command line interface (CLI)
The CLI (Command Line Interface) is an S-Filer Portal component that allows file transfers in a command line mode. The CLI is usually used through scripts to automate recurring transfers.
This chapter introduces you to the S-Filer Portal Command Line Interface installation.
The customer receives in their S-Filer Support community the appropriate package for their environment.
You can launch the installer by clicking directly on the executable sfiler-cli-installer.exe. For Windows Core versions you can use the -i console parameter on the command line: sfiler-cli-installer.exe -i console
After launching the installer, it prompts you to close all applications running to eliminate all sources of conflict. Once all applications are closed, you must click on the Next button to proceed to the next step.
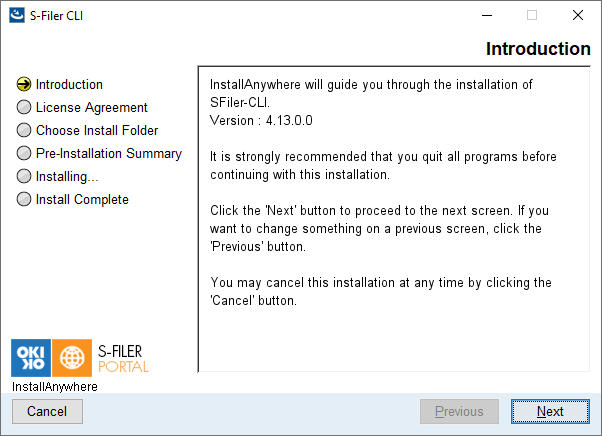
You are then prompted to read and accept the license to use the product S-Filer CLI. To accept the license, you must press the Next button. If you would like more information about the license, please contact your technical support.
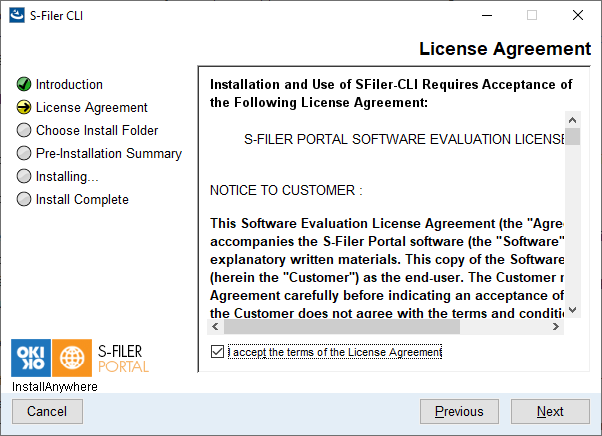
Once you have accepted the license, you must enter the destination directory. You can browse your file system using the Choose button. Once the directory is specified, press the Next button to proceed to the next step. In the event you wish to return to the default location, simply click the Restore Default Folder button.
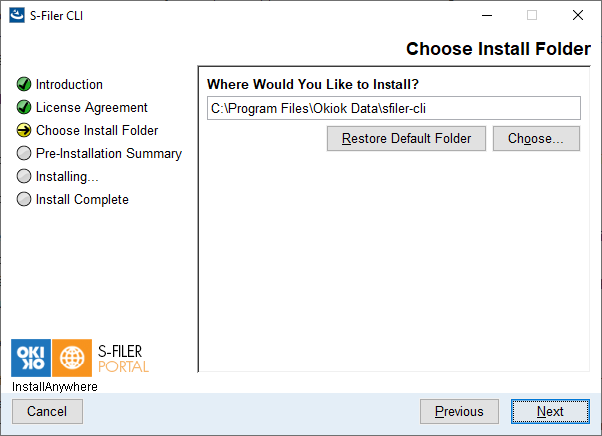
The next step prompts you to confirm your selection and proceed with installation.
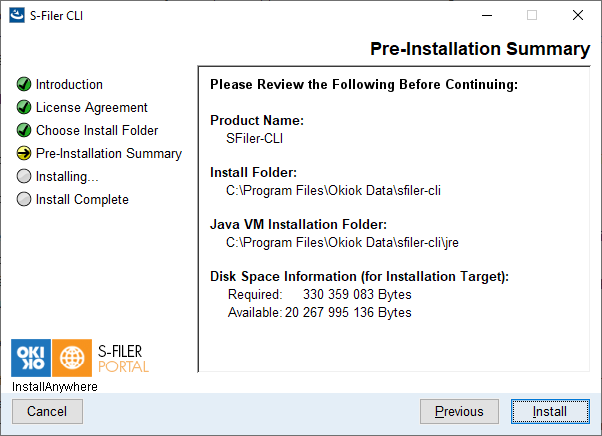
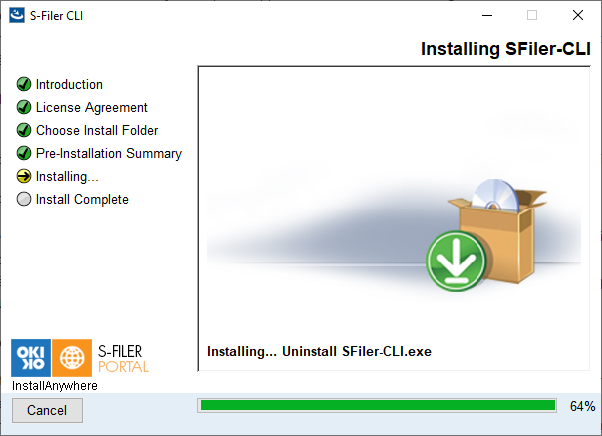
You can follow the progress of the installation via the progress bar at the bottom of the window. To avoid any potential problems, the CLI installs its own JRE (Java Runtime Environment).
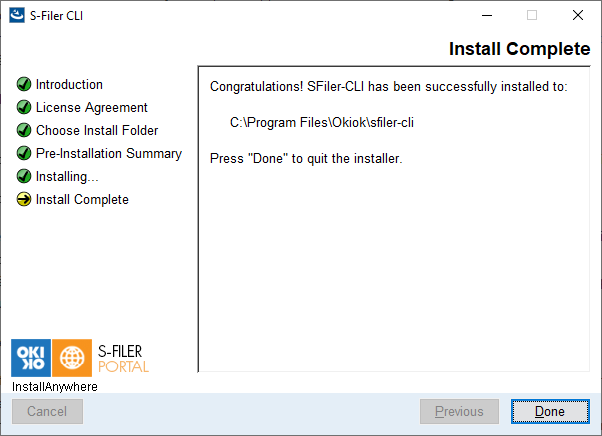
At the end of the installation, if everything went well, a message appears indicating that the installation is completed. If an error occurs during installation, note the error, and contact technical support.
Linux
The Server
To start the installation, run the sfiler-server-installer.bin. Make sure you have proper permissions on the executable file. If this is not the case, run the following command:
chmod 755 sfiler-server-installer.binOnce the rights to the file are appropriate, start the installation directly from the command line
./sfiler-server-installer.binThe first step of the installer prompts you to choose the language.
[root@localhost tmp]# ./sfiler-server-installer.bin

Preparing to install

Extracting the JRE from the installer archive...

Unpacking the JRE...

Extracting the installation resources from the installer archive...

Configuring the installer for this system's environment...

Launching installer...

=====================================================================

Choose Locale\...

----------------

->1- English
  2- Español
  3- Français

CHOOSE LOCALE BY NUMBER:
Then, the installation prompts you to close all applications running in order to eliminate any possible conflict. Press ENTER to move to the next step.
=====================================================================
S-Filer Server (created with InstallAnywhere)
---------------------------------------------------------------------
Preparing CONSOLE Mode Installation...

=====================================================================
Introduction
------------

InstallAnywhere will guide you through the installation of S-Filer
Server.

It is strongly recommended that you quit all programs before
continuing with this installation.

Respond to each prompt to proceed to the next step in the
installation. If you want to change something on a previous step, type 'back'.

You may cancel this installation at any time by typing 'quit'.

PRESS <ENTER> TO CONTINUE:
The license text will be displayed. You must accept the terms of use of the solution to continue the installation. Press Y (for Yes) to proceed to the next step. If you would like more information on the license, please contact support.
After accepting the license, you are prompted for the installation type of the server. A "Complete Installation" will install all the required components and configuration files. If you are installing S-Filer for the first time, please select this option. An ''Update'' will upgrade your existing S-Filer installation with the new features and leave your configuration files intact.
DO YOU ACCEPT THE TERMS OF THIS LICENSE AGREEMENT? (Y/N): Y
=========================================================================

Choose Install Set
------------------

Please choose the Install Set to be installed by this installer

->1- Complete Installation
->2- Update

ENTER THE NUMBER FOR THE INSTALL SET, OR PRESS <ENTER> TO ACCEPT THE DEFAULT
 :
Next, you are prompted for the installation directory of the server. To accept the default directory, press ENTER key in the target directory if desired.
===============================================================================
Choose Install Folder
---------------------

If you are upgrading, please choose your existing install directory

Where would you like to install?

  Default Install Folder: /usr/local/sfiler-server

ENTER AN ABSOLUTE PATH, OR PRESS \<ENTER\> TO ACCEPT THE DEFAULT
  :
You must now choose a temporary folder that will be used by the server. If the folder does not exist, it will be created during the installation. Make sure that you have write permission on the selected location.
===============================================================================
Temporary folder
----------------

Enter the location of the temporary folder that will be used by the
server. If

the folder doesn't exist, it will be created. Please confirm that you
have write permissions in the selected location.

Please Choose a temporary folder (Default: /tmp):
You will then be asked the name and where you would like to add the server start script. You have 2 options; one is to put it in the /etc/init.d directory or to create it in the installation directory.
===============================================================================
Startup script name
-------------------

Enter the name of the startup script. If you are installing on a machine
that already has a server installed, be careful to choose a different file
name that was used in previous installations.

Startup script name (Default: sfiler):
===============================================================================
Choose the startup script path
------------------------------

Select the path where you would like to have the startup script. If you
have root access, select option 1, otherwise choose option 2 to install them
in the install folder.

->1- /etc/init.d
  2- Installed Folder (non root access)

ENTER THE NUMBER FOR YOUR CHOICE, OR PRESS \<ENTER\> TO ACCEPT THE
DEFAULT:
The next step is simply to confirm the settings selected.
===============================================================================
Pre-Installation Summary
------------------------

Please Review the Following Before Continuing:

Product Name:
    S-Filer Server

Install Folder:
    /usr/local/sfiler-server

Link Folder:
    /root

Disk Space Information (for Installation Target):
    Required: 514,210,874 Bytes
    Available: 32,034,263,040 Bytes

PRESS <ENTER> TO CONTINUE:
If the parameters are correct, simply press ENTER to complete installation of the S-Filer Portal Server.
=========================================================================
Ready To Install
----------------

InstallAnywhere is now ready to install S-Filer Server onto your system
at the following location:

    /usr/local/sfiler-server

PRESS <ENTER> TO INSTALL:
One can then follow the installation progress.
Installing...
-------------
[==================|==================|==================|==============
[------------------|------------------|------------------|------------
The last step confirms that the installation was successful. In case of problems, please contact support.
=========================================================================
Installation Complete
---------------------

Congratulations. S-Filer Server has been successfully installed to:
    /usr/local/sfiler-server
PRESS <ENTER> TO EXIT THE INSTALLER:Important: Remember to write down any changes to default values in the Check List supplied at the end of this manual.
The Gateway
To start the installation, run the sfiler-gateway-installer.bin. Make sure you have proper permissions on the executable file. If this is not the case, run the following command:
chmod 755 sfiler-gateway-installer.binOnce the rights to the file are appropriate, start the installation directly from the command line:
./sfiler-gateway-installer.binThe first step of the installer prompts you to choose the language.
[root@localhost tmp]# ./sfiler-gateway-installer.bin

Preparing to install

Extracting the JRE from the installer archive...
Unpacking the JRE...
Extracting the installation resources from the installer archive...
Configuring the installer for this system's environment...
Launching installer...

===============================================================================

Choose Locale...
----------------

->1- English
  2- Español
  3- Français

CHOOSE LOCALE BY NUMBER:
The installation then prompts you to close all applications running in order to eliminate any possible conflict. Press ENTER to move to the next step.
===============================================================================
S-Filer Gateway                                  (created with InstallAnywhere)
-------------------------------------------------------------------------------

Preparing CONSOLE Mode Installation...

===============================================================================
Introduction
------------

InstallAnywhere will guide you through the installation of S-Filer Gateway.

It is strongly recommended that you quit all programs before continuing
with this installation.

Respond to each prompt to proceed to the next step in the installation.
If you want to change something on a previous step, type 'back'.

You may cancel this installation at any time by typing 'quit'.

PRESS <ENTER> TO CONTINUE:
The license text will be displayed; you must accept the terms of use of the solution to continue the installation. Press Y (for Yes) to proceed to the next step. If you would like more information on the license, please contact support.
After accepting the license, you are prompted for the installation type of the gateway. A "Complete Installation" will install all the required components and configuration files. If you are installing S-Filer for the first time, please select this option. An ''Update'' will upgrade your existing S-Filer installation with new features and leave your configuration files intact.
DO YOU ACCEPT THE TERMS OF THIS LICENSE AGREEMENT? (Y/N): Y

===============================================================================
Choose Install Set
------------------

Please choose the Install Set to be installed by this installer.

->1- Complete Installation
  2- Update

ENTER THE NUMBER FOR THE INSTALL SET, OR PRESS <ENTER> TO ACCEPT THE
DEFAULT

:
Next, you are prompted for the installation directory of the server. To accept the default directory, press ENTER key in the target directory if desired.
===============================================================================
Choose Install Folder
---------------------

If you are upgrading, select the existing install directory.

Where would you like to install?

    Default Install Folder: /usr/local/sfiler-gateway

ENTER AN ABSOLUTE PATH, OR PRESS <ENTER> TO ACCEPT THE DEFAULT

 :
You must now choose a temporary folder that will be used the gateway. If the folder does not exist, it will be created during the installation. Make sure that you have write permission on the selected location.
===============================================================================
Temporary folder
----------------

Enter the location of the temporary folder that will be used by the
Gateway. If the folder doesn't exist, it will be created. Please confirm that you
have written permissions in the selected location.

Please Choose a temporary folder (DEFAULT: /tmp):
You will then be asked the name and where you would like to add the server start script. You have 2 options; one is to put it in the /etc/init.d directory or to create it in the installation directory.
===============================================================================
Startup script name
-------------------

Enter the name of the startup script. If you are installing on a machine
that already has a Gateway installed, be careful to choose a different file
name than the one used in previous installations.

Startup script name (DEFAULT: sfiler-gateway):

===============================================================================
Choose the startup script path
------------------------------

Select the path where you would like to have the startup script. If you
have root access, select option 1, otherwise choose option 2 to install them
in the install folder.

->1- /etc/init.d
  2- Installed Folder (non root access)

ENTER THE NUMBER FOR YOUR CHOICE, OR PRESS <ENTER> TO ACCEPT THE
DEFAULT:
The next step is simply to confirm the settings selected.
===============================================================================
Pre-Installation Summary
------------------------

Please Review the Following Before Continuing:

Product Name:
    S-Filer Gateway

Install Folder:
    /usr/local/sfiler-gateway

Link Folder:
    /root

Disk Space Information (for Installation Target):
    Required: 447,100,864 Bytes
    Available: 31,342,125,056 Bytes

PRESS <ENTER> TO CONTINUE:
If the parameters are correct, press ENTER to continue installing S-Filer Gateway / Portal.
===============================================================================
Ready To Install
----------------

InstallAnywhere is now ready to install S-Filer Gateway onto your system
at the following location:
    /usr/local/sfiler-gateway

PRESS <ENTER> TO INSTALL:
One can then follow the installation progress.
A final step confirms that the installation was successful. In case of problems, please contact support.
===============================================================================
Installation Complete
---------------------

Congratulations. S-Filer Gateway has been successfully installed to:
    /usr/local/sfiler-gateway

Your old themes has been saved at:
    /usr/local/sfiler-gateway/gateway/

PRESS <ENTER> TO EXIT THE INSTALLER:
Once the installation process has completed, it is time to process with the Basic Configuration importation. These are the files that you should recover from the Administrative Console. It is now required to move those files in the "gateway" folder of the S-Filer Gateway installation. To proceed with the importation, you need to open a shell in the S-Filer Gateway "gateway" folder. In this folder, you now have a new command line utility called the sfiler-config-cli. Run the command with the arguments that matches your installation specificities:
sfiler-config-cli.sh set-basic-config -bcdf [instance-name]-conf-gateway.txt -scf conf/sfiler.conf.templateRepeat the same operation for the Web Interface:
sfiler-config-cli.sh set-basic-config -bcdf [instance-name]-conf-gateway.txt -scf conf/gui.conf.templateThat last operation completes the installation procedure for the S-Filer Gateway. You can take some time to validate that the properties of the conf/sfiler.conf.template and conf/gui.conf.template files are filled. If that is not the case, consider looking at the sfiler-config-cli logs located in the /logs folder.
At this point, you can now launch the S-Filer Gateway by running the following start-up script:
service sfiler-gateway startDepending on your version of UNIX (Linux, Solaris, BSD or other) it is possible that some adjustments are necessary in the start-up script. The version distributed has been validated for Red Hat-like environments.
Installing a customer graphical theme
If a customer-specific graphical theme was provided for your deployment, it is installed on the Gateway. Gateway themes live under .../sfiler-gateway/gateway/webapps/sfiler-gui-ajax/themes, next to the default sfiler theme. Copy the customer theme folder into that directory, then restart the Gateway service so that the new theme is served.
See Also
For details on building and customizing a theme (logos, login page, CSS, notification messages), see the Customization Guide.
The command line interface (CLI)
To start the installation, run the sfiler-cli-installer.bin. Make sure you have proper permissions on the executable file. If this is not the case, run the following command:
chmod 755 sfiler-cli-installer.binOnce the rights to the file are appropriate, start the installation directly from the command line
./sfiler-cli-installer.binThe first step of the installer prompts you to choose the language.
[root@localhost tmp]# ./sfiler-cli-installer.bin

Preparing to install

Extracting the JRE from the installer archive...
Unpacking the JRE...
Extracting the installation resources from the installer archive...
Configuring the installer for this system's environment...
Launching installer...

===============================================================================
Choose Locale...
-------------

->1- English
  2- Español
  3- Français

CHOOSE LOCALE BY NUMBER:
Then, the installation prompts you to close all applications running in order to eliminate any possible conflict. Press ENTER to move to the next step.
===============================================================================
SFiler-CLI (created with InstallAnywhere)
------------------------------------------------------------

Preparing CONSOLE Mode Installation...

===============================================================================
Introduction
----------

InstallAnywhere will guide you through the installation of SFiler-CLI.
Version : 4.19.0.0

It is strongly recommended that you quit all programs before continuing
with this installation.

Respond to each prompt to proceed to the next step in the installation.
If you want to change something on a previous step, type 'back'.

You may cancel this installation at any time by typing 'quit'.

PRESS <ENTER> TO CONTINUE:
The license text will be displayed. You must accept the terms of use of the solution to continue the installation. Press Y (for Yes) to proceed to the next step. If you would like more information on the license, please contact support.
After accepting the license, you are prompted for the installation directory of the CLI. To accept the default directory, press ENTER key in the target directory if desired.
DO YOU ACCEPT THE TERMS OF THIS LICENSE AGREEMENT? (Y/N): y

===============================================================================
Choose Install Folder
---------------------

Where would you like to install?
    Default Install Folder: /usr/local/SFiler-CLI

ENTER AN ABSOLUTE PATH, OR PRESS \<ENTER\> TO ACCEPT THE DEFAULT
    :
The next step is simply to confirm the settings selected.
===============================================================================
Pre-Installation Summary
-------------------------

Please Review the Following Before Continuing:

Product Name:
    SFiler-CLI

Install Folder:
    /usr/local/SFiler-CLI

Java VM Installation Folder:
    /usr/local/SFiler-CLI/jre

Disk Space Information (for Installation Target):
    Required: 332,369,003 Bytes
    Available: 30,528,475,136 Bytes

PRESS <ENTER> TO CONTINUE:
If the parameters are correct, simply press ENTER to complete installation of the CLI.
===============================================================================

Ready To Install

----------------

InstallAnywhere is now ready to install SFiler-CLI onto your system at
the following location:

    /usr/local/SFiler-CLI

PRESS <ENTER> TO INSTALL:
One can then follow the installation progress.
Installing...
-------------

[==================|==================|==================|==============
[------------------|------------------|------------------|----------
The last step confirms that the installation was successful. In case of problems, please contact support.
===============================================================================
Installation Complete
---------------------

Congratulations. SFiler-CLI has been successfully installed to:
    /usr/local/SFiler-CLI

PRESS <ENTER> TO EXIT THE INSTALLER:
Configuration
Configuring the database
This guide has been moved to the section Configuring the database.
Naming your S-Filer server instance
The instance is a unique name that will be used to identify your S-Filer server. You can assign an instance name to your S-Filer server by specifying it in the [install folder]/server/conf/sfiler.conf file. You must modify the following line:
cfg.server.local.config.instanceName=[INSTANCE_NAME]Note
If you choose to modify the instance name, make sure it matches the name assigned in the Administrative Console.
Creating a systemd service file
Create a unit file in the /etc/systemd/system/ directory and make sure it has correct file permissions. Execute as root or for non-root user acquire permission for these system folders.
For S-Filer server
touch /etc/systemd/system/sfiler.service
chmod 664 /etc/systemd/system/sfiler.service
Open the sfiler.service file created in the previous step, and add the service configuration options
[Unit]
Description=S-Filer-Server
Wants=network-online.target
After=network.target network-online.target

[Service]
Type=forking
WorkingDirectory=/home/sfiler/sfiler-server/script/
ExecStart=/bin/sh -x sfiler start
ExecReload=/bin/sh -x sfiler restart
ExecStop=/bin/sh -x sfiler stop
User=sfiler
Group=sfiler
PIDFile=/home/sfiler/sfiler-server/server/sfiler-server.pid

[Install]
WantedBy=multi-user.target
Notify systemd that a new file exists by executing the following command as root or for non-root user acquire permission to run these commands.
systemctl daemon-reload
systemctl start sfiler.service
Always run the systemctl daemon-reload command after creating new unit files or modifying existing unit files. Otherwise, the systemctl start or systemctl enable commands could fail due to a mismatch between states of systemd and actual service unit files on disk.
Enable sfiler.service, so that it starts automatically at boot:
systemctl enable sfiler.serviceFor S-Filer gateway
touch /etc/systemd/system/sfiler-gateway.service
chmod 664 /etc/systemd/system/sfiler-gateway.service
Open the sfiler-gateway.service file created in the previous step, and add the service configuration options
[Unit]
Description=S-Filer-Gateway
Wants=network-online.target
After=network.target network-online.target

[Service]
Type=forking
WorkingDirectory=/home/sfiler/sfiler-gateway/script/
ExecStart=/bin/sh -x sfiler-gateway start
ExecReload=/bin/sh -x sfiler-gateway restart
ExecStop=/bin/sh -x sfiler-gateway stop
User=sfiler
Group=sfiler
PIDFile=/home/sfiler/sfiler-gateway/gateway/sfiler-gateway.pid

[Install]
WantedBy=multi-user.target
Notify systemd that a new file exists by executing the following command as root or for non-root user acquire permission to run these commands.
systemctl daemon-reload
systemctl start sfiler-gateway.service
Always run the systemctl daemon-reload command after creating new unit files or modifying existing unit files. Otherwise, the systemctl start or systemctl enable commands could fail due to a mismatch between states of systemd and actual service unit files on disk.
Enable sfiler-gateway.service, so that it starts automatically at boot:
systemctl enable sfiler-gateway.serviceAdministrative Console Configuration
By default, the S-Filer Administrative console is not configured to use SSL. If you want to activate SSL, you can do it before starting the S-Filer Server by using the sfiler-config-cli tool. There is a script called sfiler-config-cli (.bat for Windows and .sh for Linux) located in the [Install folder]/server folder.
Importing an existing private key prior to starting the Server
You can import an existing private key prior to starting the Server by using the sfiler-config-cli tool. There is a script called sfiler-config-cli (.bat for Windows and .sh for Linux) located in the [Install folder]/server folder.
You need to run the following command:
sfiler-config-cli.[bat/sh] -l *db_user_name* -p *db_password* import-certificate-file -a *alias* -pw *keystore_password* -f *path/to/key_pair* -apply-configuratorThe parameters db_user_name and db_password represents the credentials that will be used to connect to the database and perform the modifications. The alias is a unique name that will be stored in the database to identify this key. The keystore_password is the password protecting the keystore file that will be imported. The '-f' argument is the path to the keystore containing the private key to import.
Generating a private key prior to starting the Server
You generate a private key prior to starting the Server by using the sfiler-config-cli tool. There is a script called sfiler-config-cli (.bat for Windows and .sh for Linux) located in the [Install folder]/server folder.
You need to run the following command:
sfiler-config-cli.[bat/sh] -l *db_user_name* -p *db_password* generate-key-pair -a *alias* -ks *key_size* -h *host* -d *duration* -apply-configuratorThe parameters db_user_name and db_password represents the credentials that will be used to connect to the database and perform the modifications. The alias is a unique name that will be stored in the database to identify this key. The keysize is the size of the key that will be generated (supported values are 2048 and 4096). The host will become the CN attribute of the generated key. The duration is the validity period (in years) of the key that will be generated (value must be between 1 and 10).
Configuring the private key in the Administrative Console
If you prefer, you could use the Administrative Console to configure its own SSL private key. You will need to start the S-Filer Server first and access the Administrative Console with an unsecured URL:
http://server-host:8090/Login.action
In the left tree, you can access the 'Administrative Console' option.
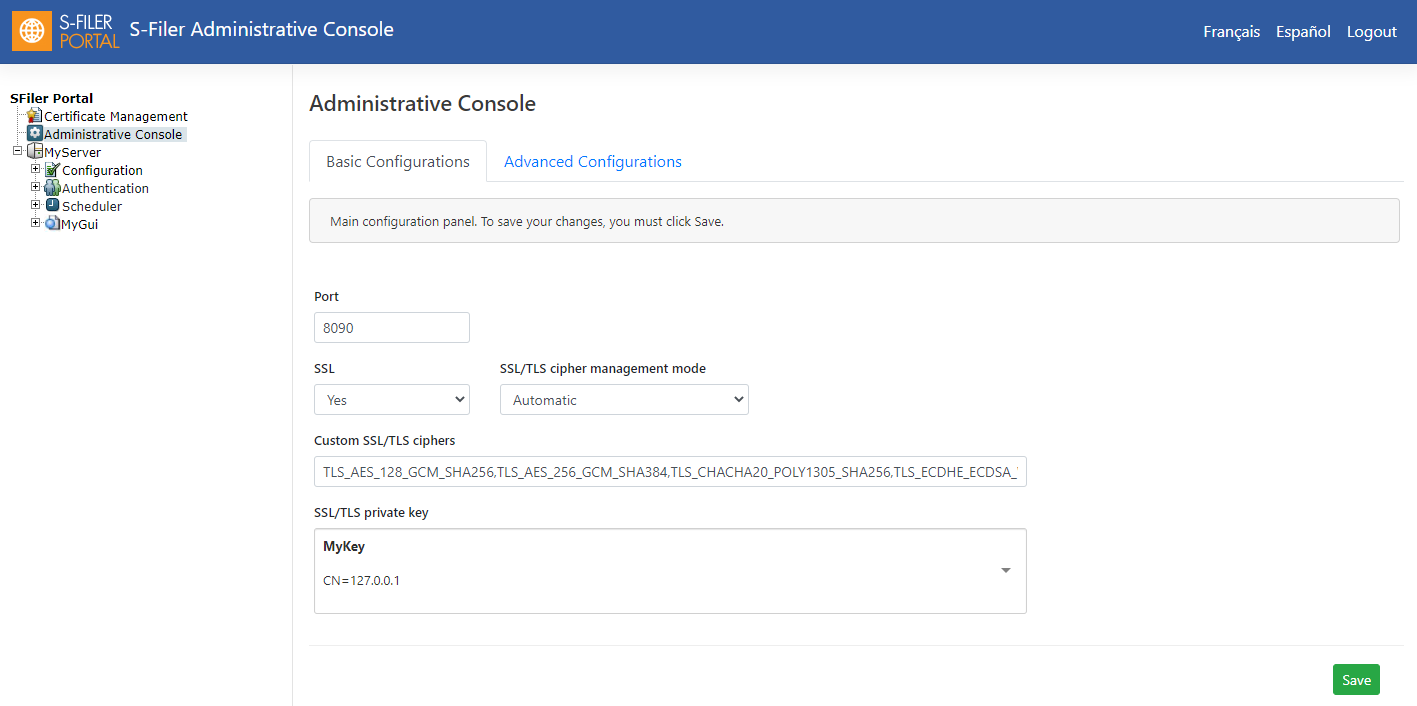
You are then presented the Administrative Console configuration panel where you can modify some information.
- Port: The port used to access the Administrative Console.
- SSL: Determines if communications with the Administrative Console will be using SSL.
- SSL/TLS private key: If SSL is activated, you need to choose the private key that will be used for the SSL communications. You need to add this key in the Certificate Manager (use the Certificate Management link in the left tree) prior to selecting it in the dropdown.
The Allow weak SSL/TLS ciphers can be set to Yes to enable the weak ciphers that were removed in S-Filer 4.5.3. The default is set to No.
Click on "Save" once you are done configuring the Administrative Console.
You need to restart the S-Filer Server after modifying any one of these properties.
Start your S-Filer Server
Windows
Go in the services manager and start the server. Locate the service called S-Filer Server and start it.
Linux
On the command line execute:
service sfiler startDepending on your version of UNIX (Linux, Solaris, BSD or other) it is possible that some adjustments are necessary in the start-up script. The version distributed has been validated for Red Hat-like environments.
Server Configuration
The server configuration will be done using the administrative console, which can be accessed at this address: (Replace server-host with the address or host name of the server's installation location.)
https://server-host:8090/Login.action
The login in the Administrative Console is done using the database credentials. The user specified to login will be the user performing the database modifications. Since the Administrative Console is only using data manipulation queries (insert, update, delete), it is advised not using a user with an admin role here.
- User Name: The database user
- Password: The database password
S-Filer Portal Initial Setup
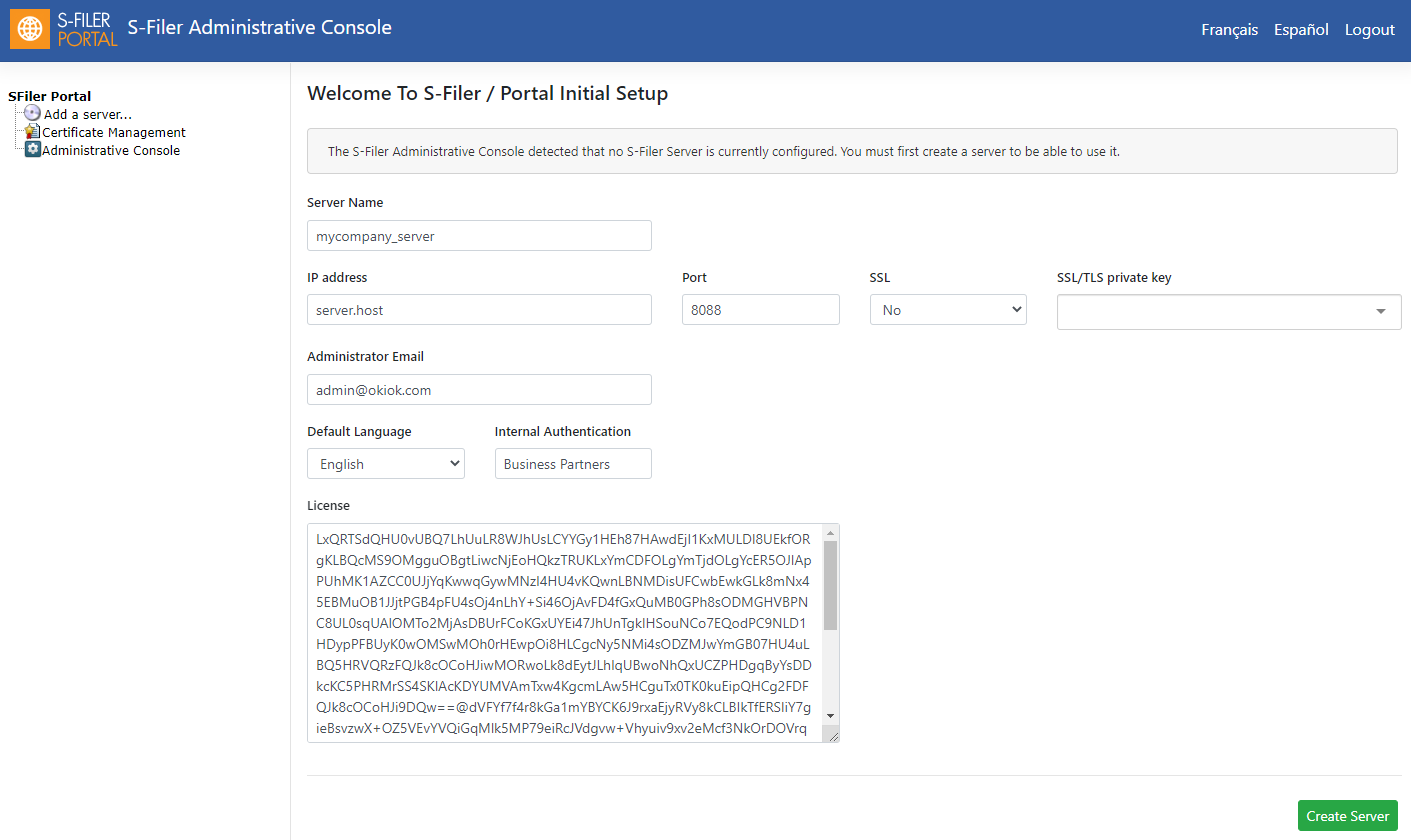
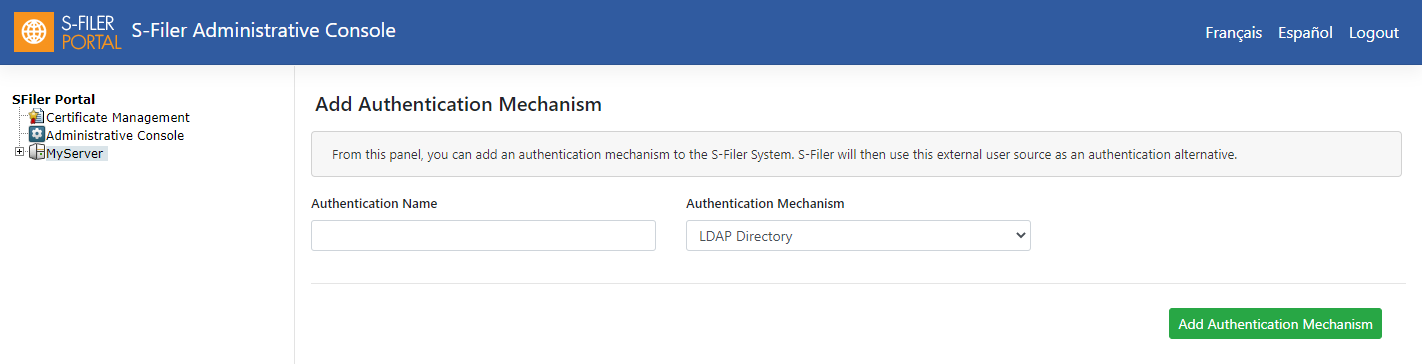
You are then presented the initial configuration panel where you need to enter some information.
- Server Name: Enter a name for your server instance. This name must match the one defined in the parameter cfg.sfiler.instance.name of the [Installfolder]/server/conf/sfiler.conf file. The default value in the configuration file is Server1 so make sure to update it if you choose another name. In this example we will use "mycompany_server".
- IP Address: Enter the address or host name of your S-Filer Portal server's machine.
- Port: This is the port that the S-Filer Portal server will listen to for communication with other components. The default value is "8088".
- SSL: Determines if communications with the server will be using SSL.
- SSL/TLS private key: If SSL is activated, you need to choose the private key that will be used for the SSL communications. You need to add this key in the Certificate Manager (use the Certificate Management link in the left tree) prior to selecting it in the dropdown.
- Administrator Email: Enter the email address of the person that will administer S-Filer Portal.
- License: Enter the license provided to you by Okiok. It is represented by a long string of characters including numbers and letters.
- Default Language: Enter the language you want to use in the S-Filer Administrative Console.
- Internal Authentication: Enter a name for the internal database authentication mechanism. The default value is "Business Partners".
Important
After creating the server instance in the Administrative Console, the property cfg.sfiler.instance.name in the [Installfolder]/server/conf/sfiler.conf file needs to be updated to match the selected server name. A server restart is required after this modification.
See Also
All S-Filer Portal Configurations can be modified through the configuration CLI.
Updating notification themes
Once the server is installed and running, the notification themes are stored in the database and can be edited from the web interface. When you prefer to work on a theme outside of the web interface — for example to apply bulk changes or to keep the templates under version control — you can use the sfiler-config-cli commands to export a theme, modify it on disk, and import it back.
The typical flow is:
Step 1 — Export the existing theme. Use export-notification-theme to retrieve the theme as a zip file whose base directory is the theme id you will need for the re-import.
./sfiler-config-cli.sh -l my-user -p my-password -cf "conf/sfiler.conf" export-notification-theme -th "notification" -od "/tmp/theme".\sfiler-config-cli.bat -l my-user -p my-password -cf "conf\sfiler.conf" export-notification-theme -th "notification" -od "/tmp/theme"Step 2 — Modify the theme. Unzip the exported file and edit the subject and body templates (*_subject.html / *_body.html) to suit your needs.
Step 3 — Import the theme back. Use import-notification-themes with the -allow-update flag so the existing theme is updated instead of returning an error. The -th parameter must reference the theme id (the base directory name found in the exported zip).
./sfiler-config-cli.sh -l my-user -p my-password -cf "conf/sfiler.conf" import-notification-themes -p /working-folder -th 1 -allow-update.\sfiler-config-cli.bat -l my-user -p my-password -cf "conf\sfiler.conf" import-notification-themes -p /working-folder -th 1 -allow-updateStep 4 (optional) — Reconcile the groups. If a group still references a notification theme by its former file-system name, run migrate-themes to link it to the corresponding database entry. Use the --dry-run option first to simulate the operation and detect any problematic group, then run it again without --dry-run to complete the reconciliation.
./sfiler-config-cli.sh -l my-user -p my-password -cf "conf/sfiler.conf" migrate-themes --dry-run.\sfiler-config-cli.bat -l my-user -p my-password -cf "conf\sfiler.conf" migrate-themes --dry-runSee Also
See the CLI reference for each command: export-notification-theme, import-notification-themes and migrate-themes.
Scheduler task configuration
The S-Filer Portal server runs a set of scheduled tasks in the background that keep the solution healthy: cleaning up expired files, adopting users, sending notifications, renewing keys, and so on.
In the administrative console, open [server name] / Scheduler in the left-hand tree to list the tasks. When you select a task, you can:
- enable or disable it with the Enabled checkbox;
- add or remove execution times, either at a Specific Time (every day, or a specific day of the week, at a given time) or at an Interval (every day, every X minutes);
- enter a Cron Expression directly when the desired schedule does not match either of those two templates;
- start the task immediately instead of waiting for its next scheduled execution.
A single task can have several execution times.
Warning
Scheduler cron expressions are six-field Quartz expressions: seconds, minutes, hours, day of month, month and day of week. For example, 0 15 0 * * ? means "every day at 00:15" and 0 0/30 * * * ? means "every 30 minutes".
Some tasks also have configuration parameters of their own. Those parameters appear in the right-hand panel when the task is selected in the tree and are described in the sections below.
Note
The schedules shown below are the ones shipped by default at installation. They may have been changed on an existing system. The list-scheduler-jobs command reports the schedules actually in effect.
Sender Email
This task checks periodically for failed email notifications and attempts to re-send them. Sometimes email failures are temporary (mailbox full or communication problem) and retrying will solve the problem. When the problem is permanent, the task will retry a number of times and then delete the notification.
Default schedule: 0 0/5 * * * ? (every 5 minutes).
This task has no configuration parameter.
File Cleanup
This task periodically checks the time-to-live (TTL) parameters on files and deletes them when they have expired. In the Web Interface, expired files appear in the communities, but it is no longer possible to download them. They will disappear when they are deleted from the storage by this task.
Default schedule: 0 15 0 * * ? (every day at 00:15).
This task has no configuration parameter.
Upload Cleanup
This task looks for partially uploaded files which have exceeded the "resuming window", the amount of time that S-Filer waits for a file upload to resume. These files are deleted when this task executes.
Default schedule: 0 1 0 * * ? (every day at 00:01).
This task has no configuration parameter.
Orphan File Cleanup
This task periodically checks the integrity of the database and the storage. Files must be present in both the database and the storage in order to be valid, and this task looks for files only present on the storage or only in the database and deletes these records. It also deletes orphan anonymous users, that is, anonymous users no longer attached to any transfer.
Default schedule: 0 0 3 * * ? (every day at 03:00).
This task has no configuration parameter.
Adoption
This task periodically connects to the various adoption sources (AD, LDAP, etc.) and adopts new users and updates existing users. It walks through every authentication source defined on the server and only processes those for which external authentication and adoption are both enabled.
Default schedule: 0 0 1 * * ? (every day at 01:00).
This task has no configuration parameter: adoption behaviour is configured on each authentication source.
User Cleanup
This task periodically checks user accounts and disables those that have exceeded the allowed inactivity period. It also deletes accounts that have been disabled for longer than the retention period for disabled accounts. The processing is done for each authentication source of the server.
Default schedule: 0 0 2 * * ? (every day at 02:00).
Parameters:
- Disabled User lifetime (in days) (cfg.server.management.service.delete.disabled.user.interval.days): this value is the number of days that a disabled user will remain in the S-Filer system. After this number of days, the user will be deleted. If this value is less than or equal to 0, the system will not delete any disabled users. Default value: 180.
- Inactive User lifetime (in days) (cfg.server.management.service.inactive.user.max.days): this value is the number of days until an inactive user account expires, it is then disabled. Users will no longer expire if this value is less than or equal to 0. Note that logging in with an account resets its inactivity period. Default value: 180.
System Event Audit Integrity Check
This task periodically verifies the integrity of the audit logs by validating the "signature" on all records and validating the chain of records to make sure no records were inserted or deleted.
Default schedule: 0 15 3 * * ? (every day at 03:15).
This task has no configuration parameter. The behaviour of the system event audit, including the alert raised when the check fails (Alert when integrity check failed), is configured under Configuration / System Event Audit.
Audit Archiving
This task removes the audit entries that are older than the configured retention period. It processes the system event audit and the transfer audit in turn; if one of the two fails, the other is still attempted. When archiving is requested, the removed entries are first written to a formatted file before being deleted from the database.
Default schedule: 0 15 1 * * ? (every day at 01:15).
This task has no parameter of its own. It is driven by the following settings of Configuration / System Event Audit:
- Number of days to keep audit (cfg.server.system.event.audit.days): retention period, in days, of the audit entries. No entry is removed if this value is less than or equal to 0. Default value: 365.
- Archive Entries (cfg.server.system.event.audit.keep): indicates whether the removed entries must be written to an archive file before being deleted. Default value: No.
- Archive file prefix (cfg.server.system.event.audit.prefix): prefix added to the name of the archive files that are produced.
- Archive destination folder (cfg.server.system.event.audit.targetFolder): folder in which the archive files are written. Default value: archives.
Password Expiration Notification
This task checks internal accounts to find those whose password is about to expire and sends a notification warning about the impending expiration.
Default schedule: 0 0 2 * * ? (every day at 02:00).
This task has no configuration parameter: the warning delay and the password lifetime are configured in the password policy of the internal authentication source.
Community Cleanup
This task removes communities or shares that have reached their expiration date or inactivity period and sends a notification to administrators of communities and shares that are about to be deleted. On each execution it proceeds in the following order:
- deletion of the communities and shares whose expiration date has been reached;
- deletion of the communities and shares whose inactivity period has elapsed;
- notification of the upcoming deletion to the administrators of the affected communities and shares.
Deletions are performed before notifications so that members of an already deleted community or share are not notified, which could happen if the task had been stopped for a long period. Members of a deleted community or share receive a notification stating the reason for the deletion (expiration or inactivity).
Default schedule: 0 0 1 * * ? (every day at 01:00).
Parameters:
- Inactive period before deleting a Share (in days) (cfg.server.transfer.service.share.allowed.inactivity.period): number of days a Share must be inactive before it is automatically deleted. The inactive Share cleanup will be disabled if this value is less than or equal to 0. Note that downloading or uploading a file in a Share resets its inactivity period and that a Share with an expiration date will never be deleted due to its inactivity period. Default value: 180.
- Inactive period before deleting a Community (in days) (cfg.server.transfer.service.community.allowed.inactivity.period): number of days a Community must be inactive before it is automatically deleted. The inactive Community cleanup will be disabled if this value is less than or equal to 0. Note that downloading or uploading a file in a Community resets its inactivity period and that a Community with an expiration date will never be deleted due to its inactivity period. Default value: -1 (disabled).
- Number of days before the Share deletion notice (cfg.server.transfer.service.share.expiration.notification.days): notification email will be sent to the administrators of a Share that is within this number of days of being automatically deleted because of its expiration date or inactivity period. The email notification will be disabled if this value is less than or equal to 0. Default value: 7.
- Number of days before the Community deletion notice (cfg.server.transfer.service.community.expiration.notification.days): notification email will be sent to the administrators of a Community that is within this number of days of being automatically deleted because of its expiration date or inactivity period. The email notification will be disabled if this value is less than or equal to 0. Default value: 7.
Certificate Expiration Notification
This task sends a notification when there are certificates that are about to expire. It computes a limit date from the current date and the configured delay, then notifies for the certificates expiring before that limit date.
Default schedule: 0 0 1 * * ? (every day at 01:00).
Parameter:
- Certificate expiration notification (days) (cfg.server.certificate.expiration.job.certificate.expire.soon.delay): delay in days between the notification and the actual certificate expiration. Set to -1 to indicate that no notification should be sent. Default value: -1.
Warning
Because the default value is -1, no certificate expiration notification is sent until a positive delay has been entered.
User Session Cleanup
This task periodically checks the inactivity period of user's sessions. If the inactivity period of the sessions is longer than the inactivity timeout specified in the server's configuration, this task deletes the expired user sessions in the database.
Default schedule: 0 0/30 * * * ? (every 30 minutes).
This task has no configuration parameter.
Key Renewal
This task renews the key pairs. On each execution it checks in turn whether the certificate authority (CA) keys, the SYSTEM keys and then the REGULAR keys must be renewed, and performs the renewal when required.
Default schedule: 0 0 2 * * ? (every day at 02:00).
This task has no configuration parameter: key lifetimes are configured in the security section of the server.
File re-encryption
This task re-encrypts files whose encryption keys have expired. It looks for the expired regular and system certificates and, for each of them, submits an asynchronous task that re-encrypts the affected files. The re-encryption itself is therefore not performed by the scheduler, but by the asynchronous task engine.
Default schedule: 0 0 3 * * ? (every day at 03:00).
This task has no configuration parameter.
See Also
See the Configuration / Asynchronous Tasks section for the configuration of the engine that runs the re-encryption tasks.
Internal tasks
Two additional tasks are scheduled directly by the server and do not appear in the scheduler of the administrative console. They are neither configurable nor able to be disabled:
- CalculateTotalStorageSizeTarget: computes the total size used on the storage by all the files and records the result in the transfer statistics. It runs at the 59th minute of every hour.
- SystemEventAuditTarget: takes the pending audit records and inserts them into the final audit table. It runs every minute.
Gateway Configuration
Create the Gateway
Return to the administrative console and click on the instance of the server in the left-hand tree view. In this case we click on mycompany_server.
In the right-hand panel, click on "Add a Gateway Client to the server". In the next panel, you need to configure the name and host of your gateway.
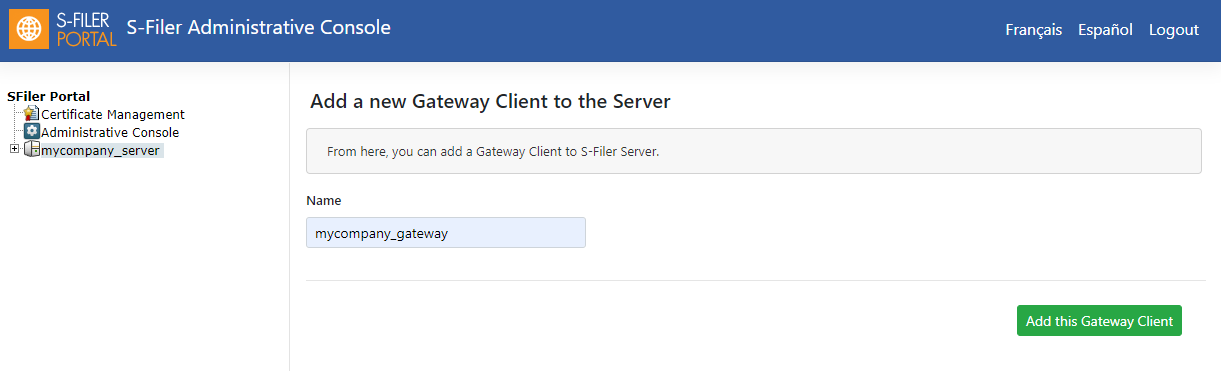
- Name: Enter a name for your gateway instance. In this example we will use "mycompany_gateway".
- IP Address/Hostname: Enter the address or host name of your s-filer gateway's machine.
Once you are satisfied with the configuration, click on "Add this Gateway Client". This will add the gateway instance.
In the left-hand tree view, if you expand "mycompany_server", you can see that "mycompany_gateway" is now present as the last option.
Enable web gui
Expand "mycompany_server / mycompany_gateway" and click on Configuration. In the right-hand panel, click on the top tab called Advanced Configurations.
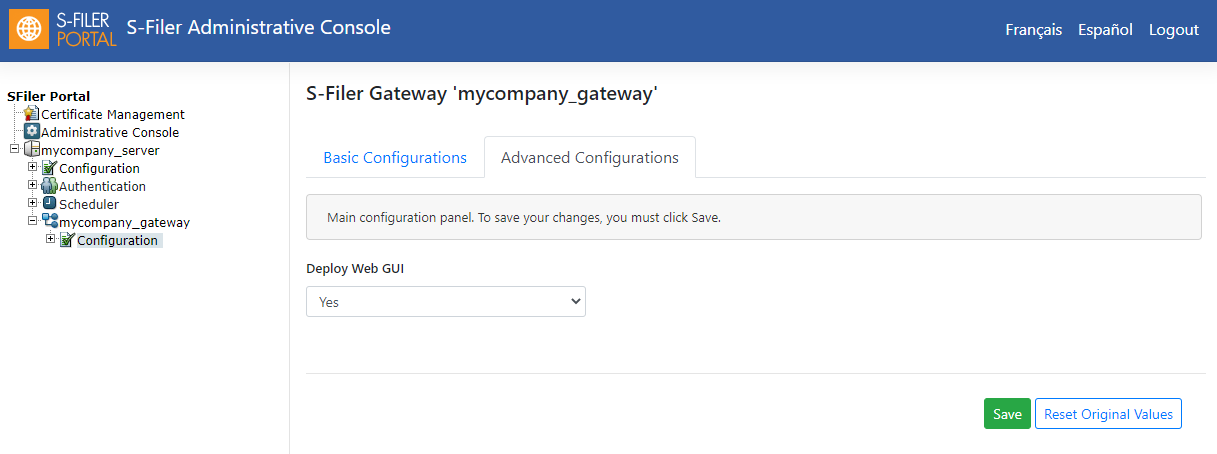
In the right-hand panel, the single line of configuration called "Deploy Web Gui" has to be set to "Yes". Click on "Save".
Other configuration
See Also
All S-Filer Portal Configurations can be modified through the configuration CLI.
In the left-hand tree view, expand "mycompany_server/mycompany_gateway/Configuration", click on "Protocol" and then click on the top tab "HTTPS".
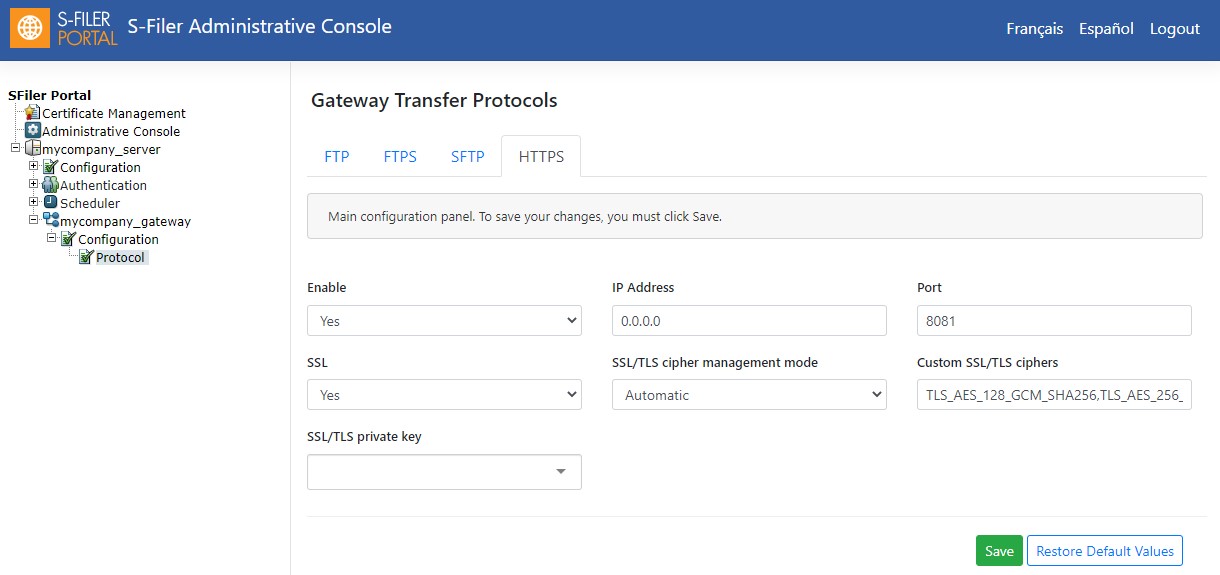
Set these values
- Enable: Yes
- IP Address: IP Address where the HTTPS server listens for incoming connection request. (Default value is 0.0.0.0)
- Port: 8081
- SSL: Yes
- SSL private key: If SSL is activated, you need to choose the private key that will be used for the SSL communications. You need to add this key in the Certificate Manager (use the Certificate Management link in the left tree) prior to selecting it in the dropdown
The port can be changed depending on the deployment requirements of your infrastructure.
The Allow weak SSL/TLS ciphers can be set to Yes to enable the weak ciphers that were removed in S-Filer 4.5.3. The default is set to No.
Click on "Save" once you are done configuring HTTPS.
To configure FTPS:
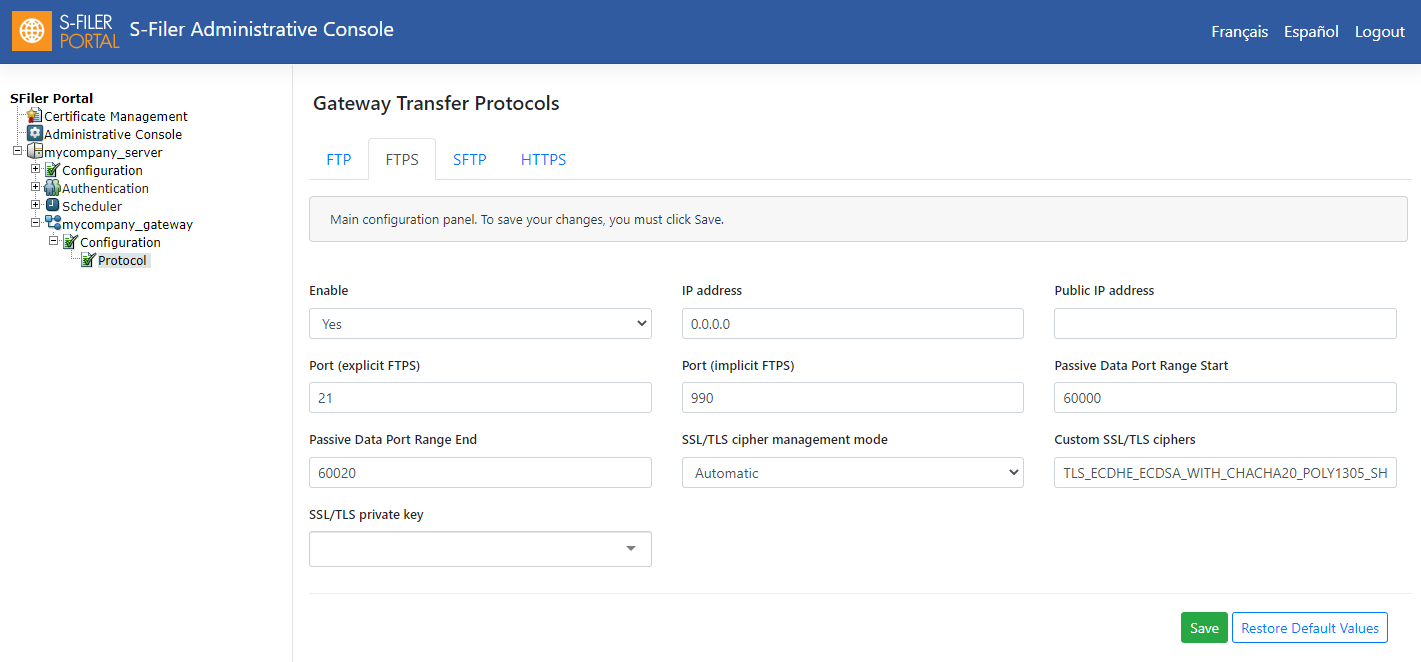
Set these values
- Enable: Yes
- Port (explicit FTPS): 21 (Default port is 21)
- IP address: IP Address where the FTP server listens for incoming connection request. (Default value is 0.0.0.0)
- Port (implicit FTPS): 990 (Default port is 990)
- SSL private key: You need to choose the private key that will be used for the SSL communications. You need to add this key in the Certificate Manager (use the Certificate Management link in the left tree) prior to selecting it in the dropdown
- Passive data port Range Start: 60000 (The data port beginning range and will need to be opened in the firewall)
- Passive data port Range End: 60020 (The data port ending range and will need to be opened in the firewall)
- Public IP Address: This is the address sent in response to PASV command. It should be visible to clients of the FTP(S) server. You should specify this address if the server has multiple network interfaces or is behind a port forwarding equipment. Leave blank to use the server address.
- Allow weak SSL/TLS ciphers: NO
The Allow weak SSL/TLS ciphers can be set to Yes to enable the weak ciphers that were removed in S-Filer 4.5.3. The default is set to No.
Click on "Save" once you are done configuring FTPS.
To configure SFTP:
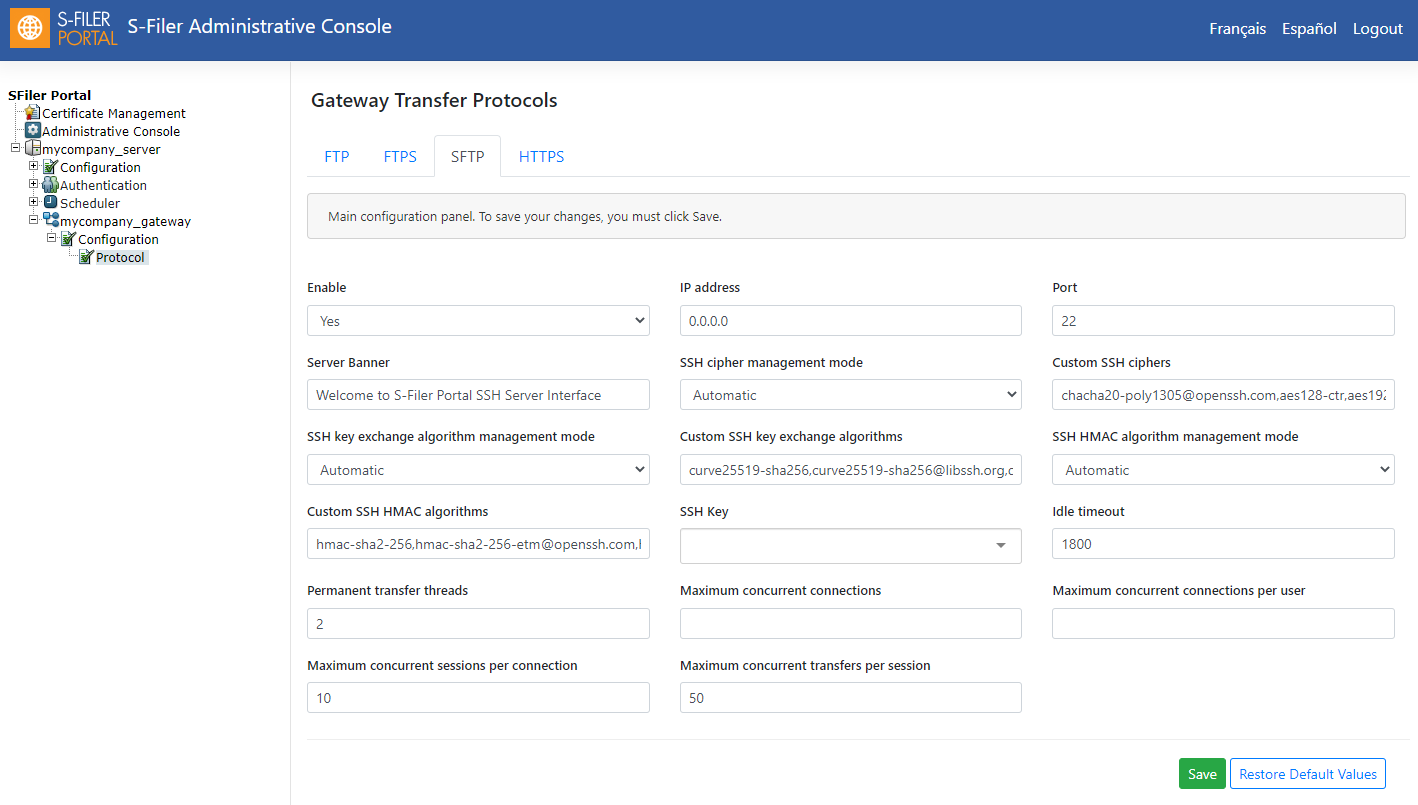
Set these values
- Enable: Yes
- IP address: IP Address where the SFTP server listens for incoming connection request. (Default value is 0.0.0.0)
- Port: 22 (Default port is 22)
- SSH Key: You need to choose the SSH key that will be used. You need to add this key in the Certificate Manager (use the Certificate Management link in the left tree) prior to selecting it in the dropdown
- Server Banner: Banner displayed by the gateway's SSH Server
- Allow weak SSH ciphers: No
The Allow weak SSL/TLS ciphers can be set to Yes to enable the weak ciphers that were removed in S-Filer 4.5.3. The default is set to No.
Click on "Save" once you are done configuring SFTP.
Basic configurations
Before being able to start the Gateway, you are required to import the Basic Configuration into the Gateway configuration files (the sfiler.conf and gui.conf). The Basic Configuration file regroups the configuration parameters that will make it possible to communicate securely with the S-Filer Server. It is required that you obtained those Basic Configuration for all the components that need to be installed. To have valid Basic Configuration, the Trusted Certificates must have been previously imported in the Administrative Console certificate Manager. When everything is in place, expand "mycompany_server / mycompany_gateway" in the right panel and click on the "download basic configurations" link. You will ask to use the sfiler-config-cli to import the basic configurations latter on in the installation procedure.
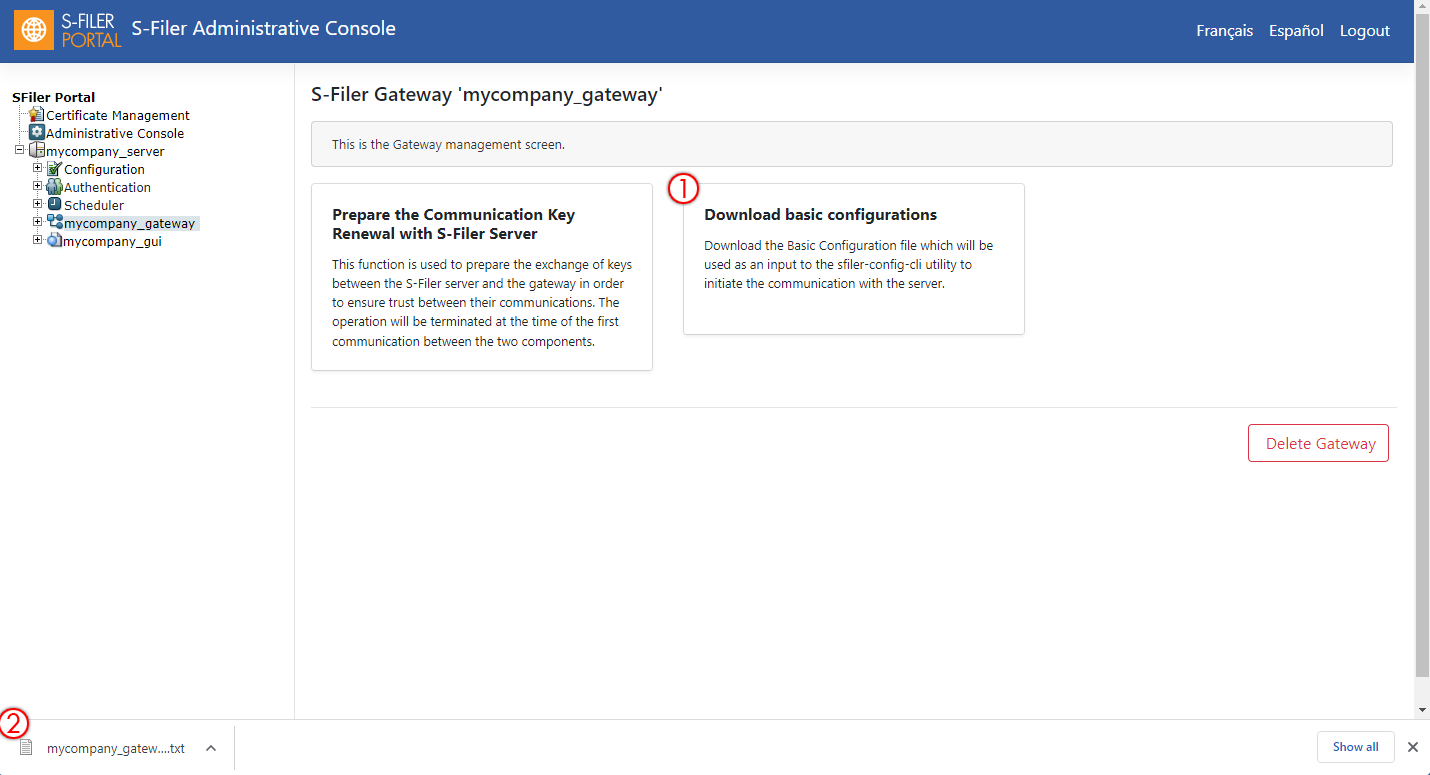
Repeat that operation for all the components that exist in your S-Filer infrastructure. As for the Gateway, you will be ask to use the sfiler-config-cli to import the basic configurations for the Web Interface.
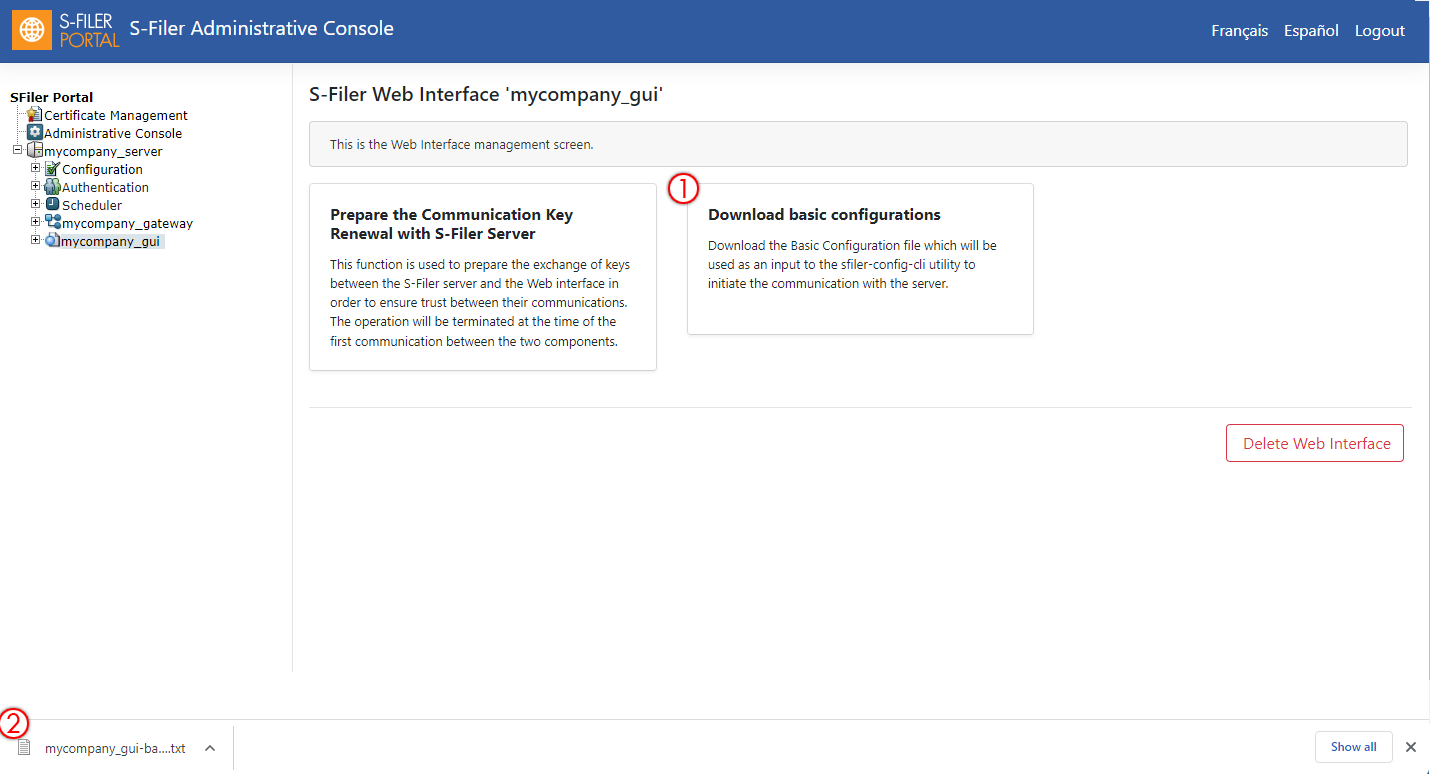
Web user interface Configuration
Add Web GUI
Click on the left-hand tree view option "SFiler Portal". Click on the instance of the server. In this case we click on mycompany_server.
In the right-hand panel, click on Add a Web Client to the server. In the next panel, you can enter information about your instance of web user interface.
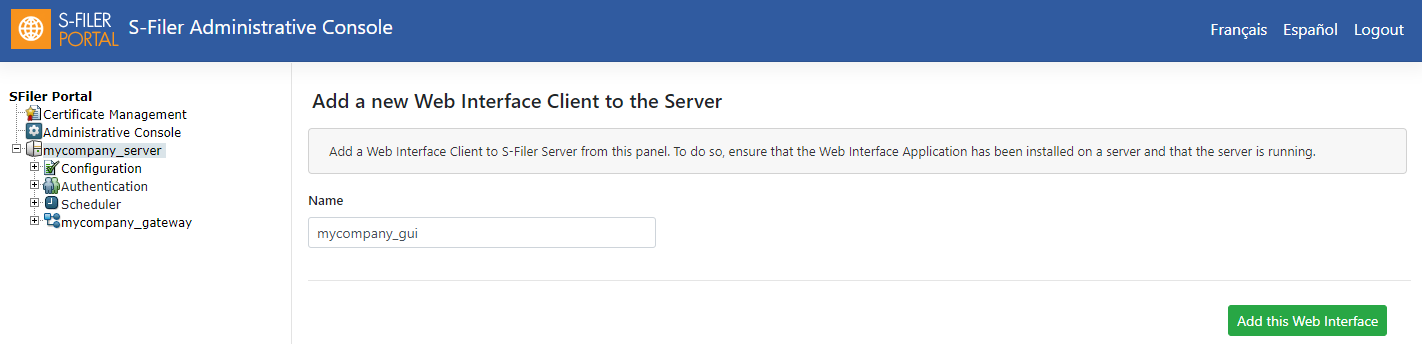
- Name: mycompany_gui (this is an example for this scenario)
Click on "Add this Web Interface".
Additional configuration
See Also
See GUI Configuration CLI Options manual for the list of web client options that can be modified through the configuration CLI.
In the left-hand tree view, expand "mycompany_server/mycompany_gui" and click on "Configuration".
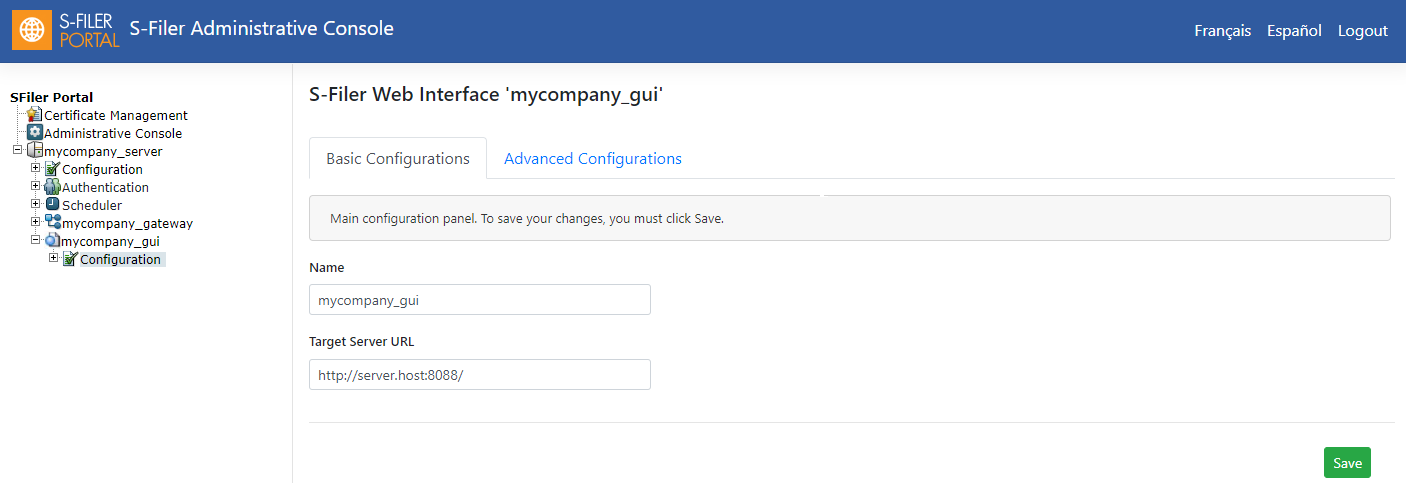
On the "Server URL" line, select the option "Custom". In the field to the right of the option, enter the listening address of the server, which in this example would be: http://server-host:8088/ Click on the upper right corner "save" button.
Setting Proxy rules
It is possible to relay transfer requests to the gateway or configure a web server (Apache or IIS) for performing this task. The main reason for using the web server application is if this one already has corporate certificates and cryptographic material. By delegating the relay requests to the S-Filer Portal Gateway, it is required to correctly configure all the certificates and cryptographic hardware needed to set up the proxy rules that are located in the Proxy in the installation package. A subdirectory contains sample configuration for Apache IIS.
Proxy rules for Apache
To set up the proxy rules for Apache, you must ensure that the modules mod_proxy and mod_proxy_http is installed and active. By default, Apache is distributed with two modules. However, they may not be activated. To activate them, open the main configuration file of Apache httpd.conf or apache.conf according to your operating system and make sure the following modules are activated (remove the # comment symbol).
- mod_proxy
- mod_proxy_http
One must then deploy the sfiler.conf under the Apache configuration tree. In most cases, copying the file in the directory conf.d sfiler.conf is sufficient. If this directory does not exist, you must insert the contents of sfiler.conf directly in the Apache configuration.
<IfDefine SSL>
  SSLProxyEngine on
</IfDefine>

ProxyRequests off

#server
ProxyPass /sfiler/server/ http://domainName:8088/
ProxyPassReverse /sfiler/server/ http://domainName:8088/

#web interface
ProxyPass /sfiler/ http://domainName:8081/sfiler/
ProxyPassReverse /sfiler/ http://domainName:8081/sfiler/

<Location /domainName/>
  Order allow,deny
  Allow from all
</Location>
You must replace domainName with the proper URL and change the ports if not using the default port 8088 for the server and 8081 for the gateway.
Proxy for IIS
Proxying through IIS is done using Microsoft's Application Request Routing.
You will need to download Microsoft Application Request Routing.
File requestRouter_amd64.msi version 3 and rewrite_amd64_en-US.msi version 2.
To install Application Request Routing
- Open a command prompt with administrator user rights.
- Stop the WAS and WMSVC processes by entering the following:
net stop was /y
net stop w3svc /y- Run requestRouter_amd64.msi:
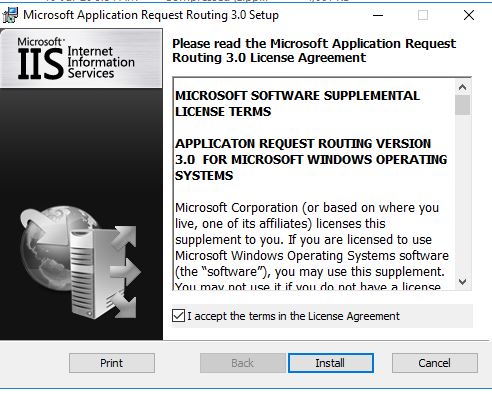
- Accept the End User License Agreement (EULA).
- Finish the installation
- Install the IIS URL Rewrite Module.
- Run rewrite_amd64_en-US.msi
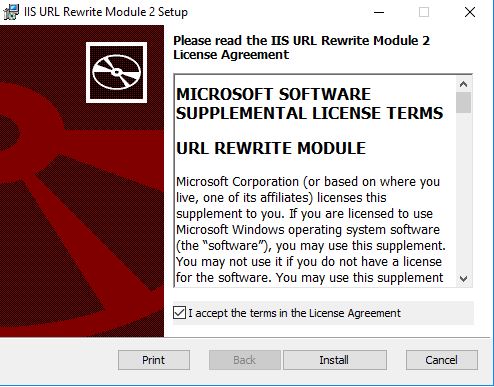
- Accept the End User License Agreement (EULA) and Install
- Complete the installation.
- Start the WAS and W3SVC processes by entering the following:
net start was
net start w3svc
Once installed you will see the Application Request Routing Cache, open this feature.
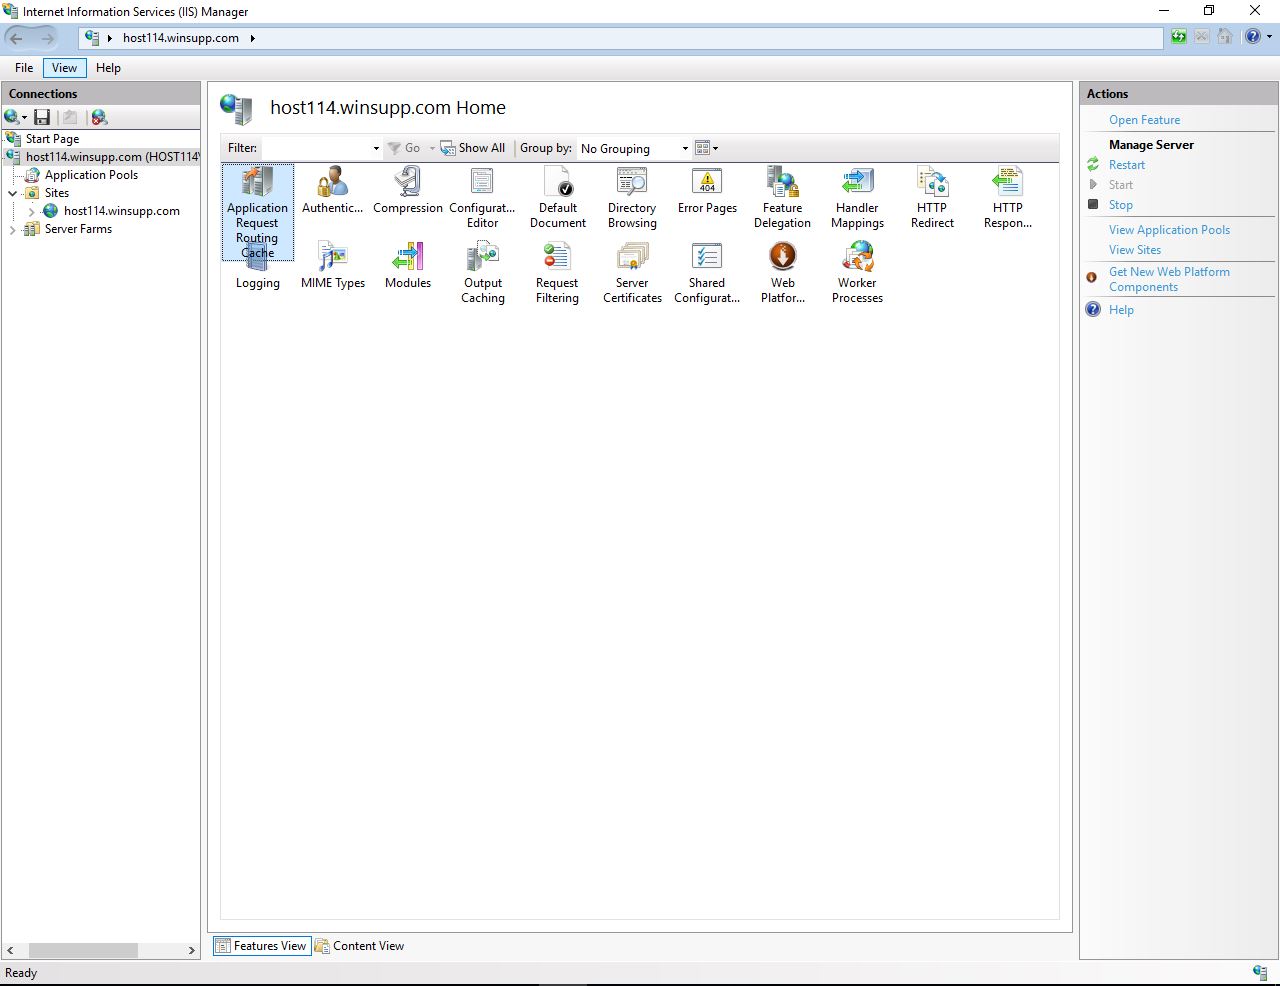
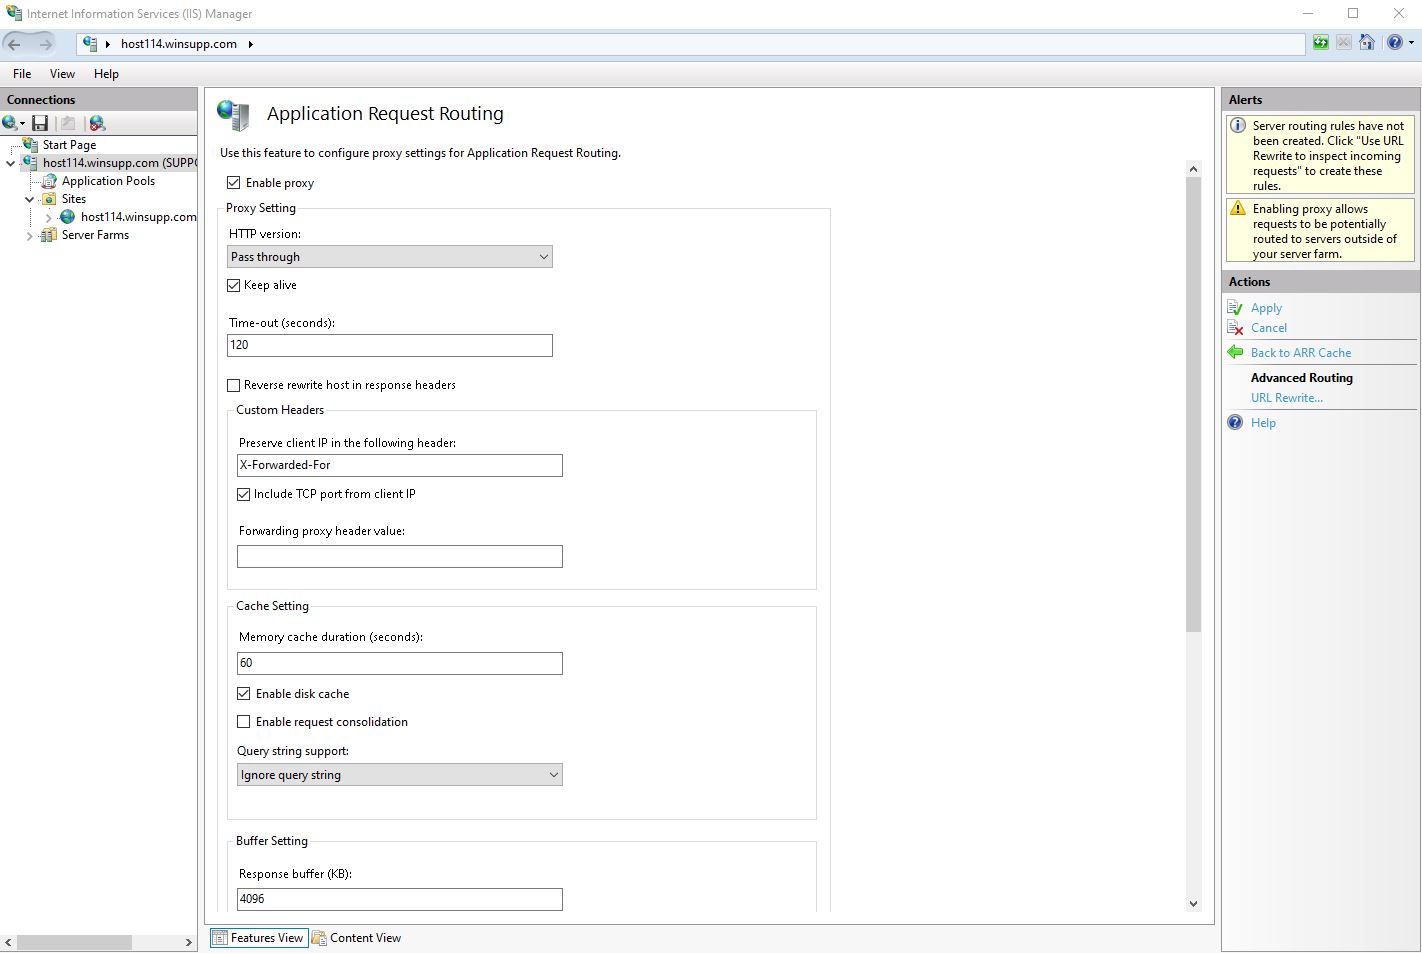
- Go to the server proxy settings
- Check "Enable Proxy"
- Uncheck "Reverse rewrite host in response headers"
- Apply changes
Note
Disregard the warning displayed by IIS since it is our objective to route requests outside the server farm to S-Filer.
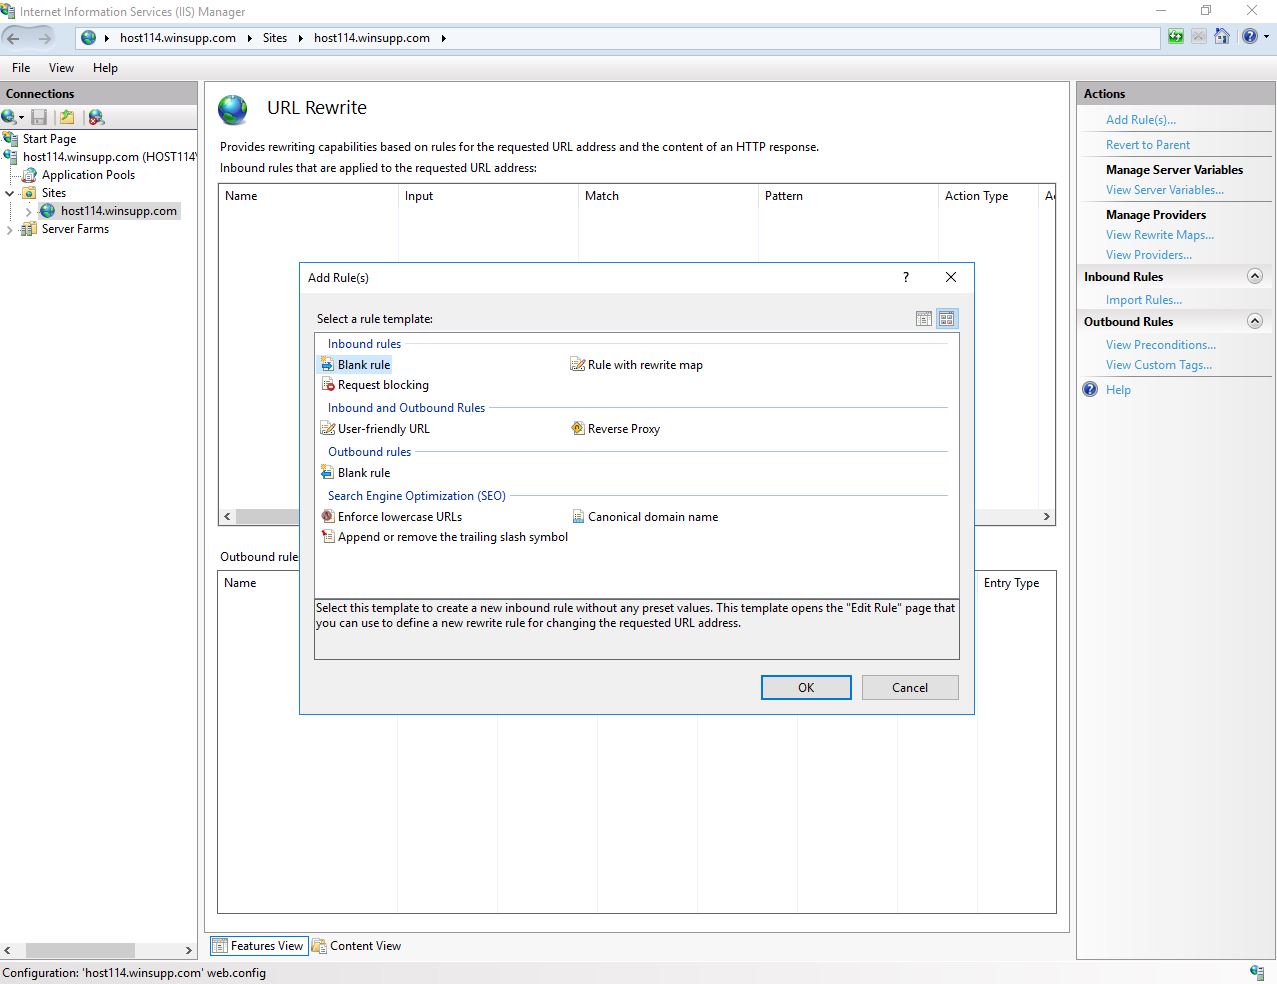
In your Web Site there will be a URL Rewrite Icon click on this icon to add a rule.
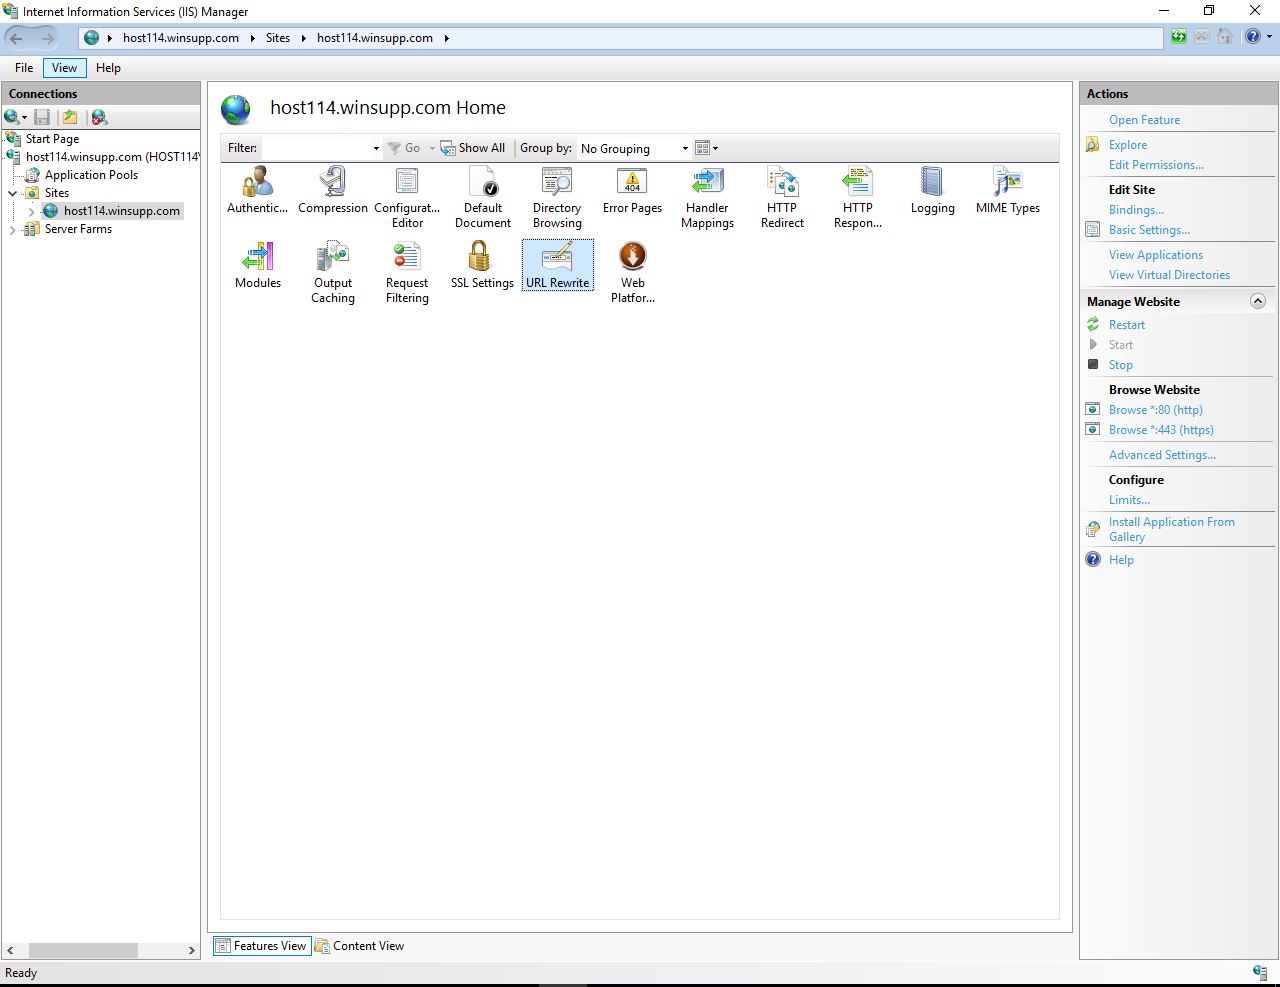
Click on add rule
Add the rule Pattern is sfiler/(.\*)
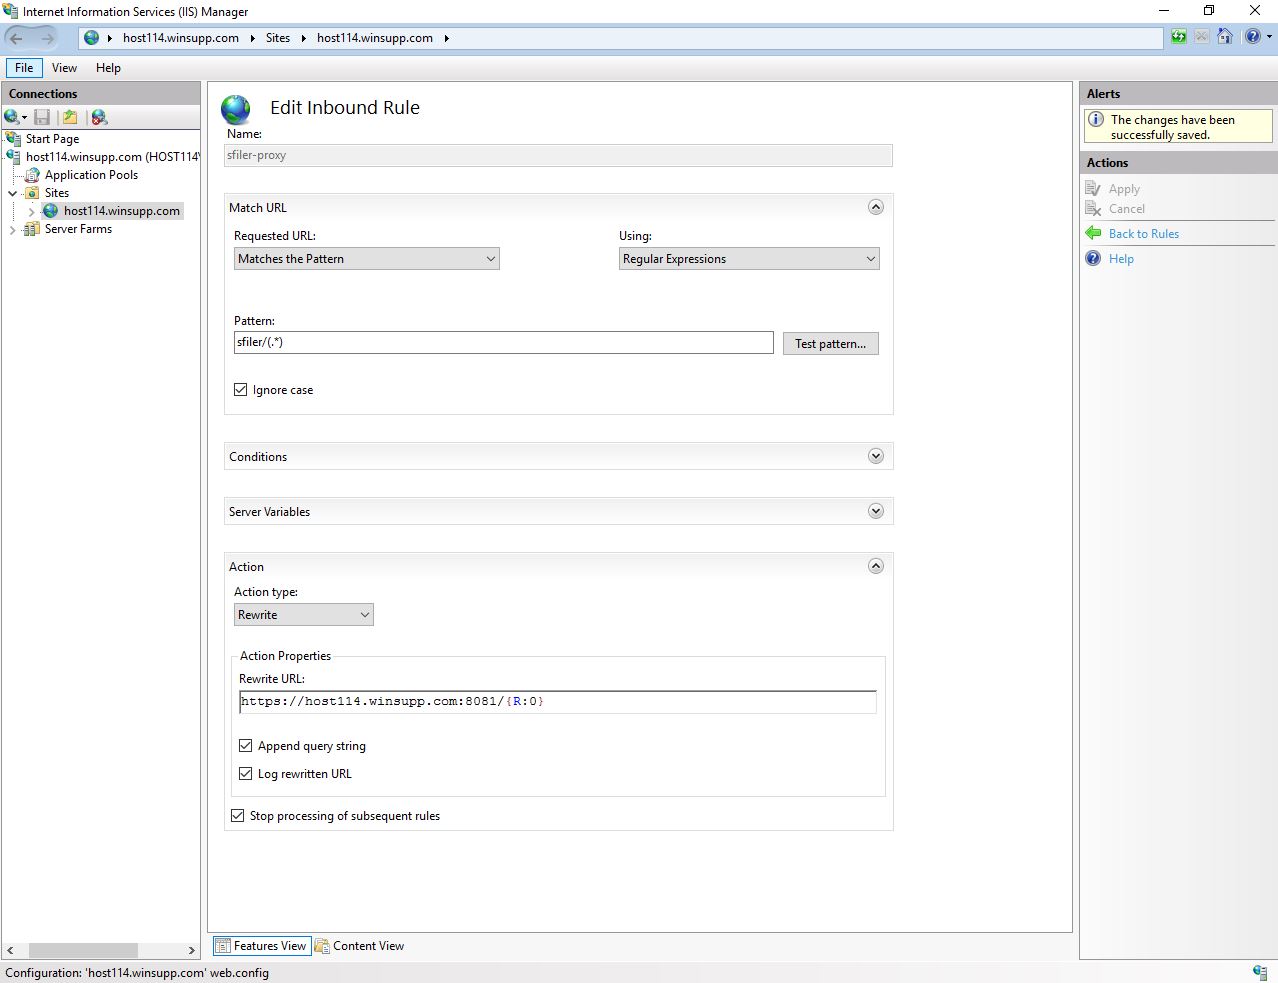
The rewrite URL for S-Filer make sure in the Action Properties that all options are active.
In my example the rewrite rule is https://host114.winsupp.com:8081/{R:0} if you chose another port for the HTTP protocol in the Gateway then use that one instead.
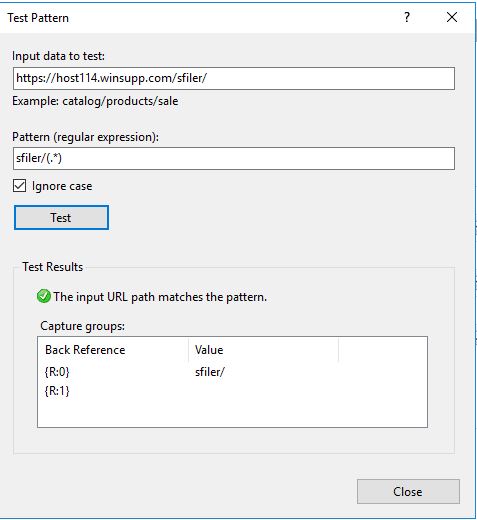
Test the rule using the application URL. In this case https://host114.winsupp.com/sfiler/
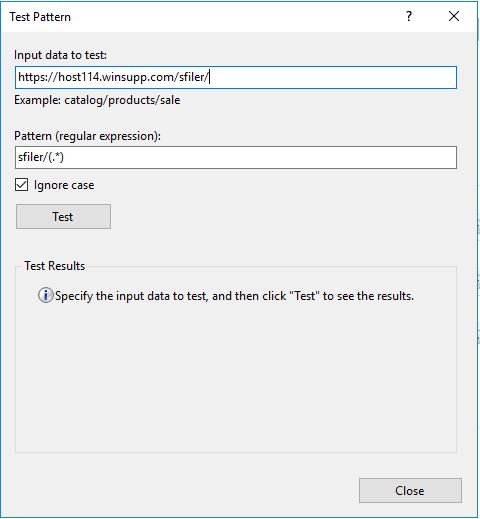
Testing the rule shows the back references to rule 0 which matches the pattern and will pass the value sfiler/ which is what we want for the S-Filer Portal application.
Apply and restart IIS
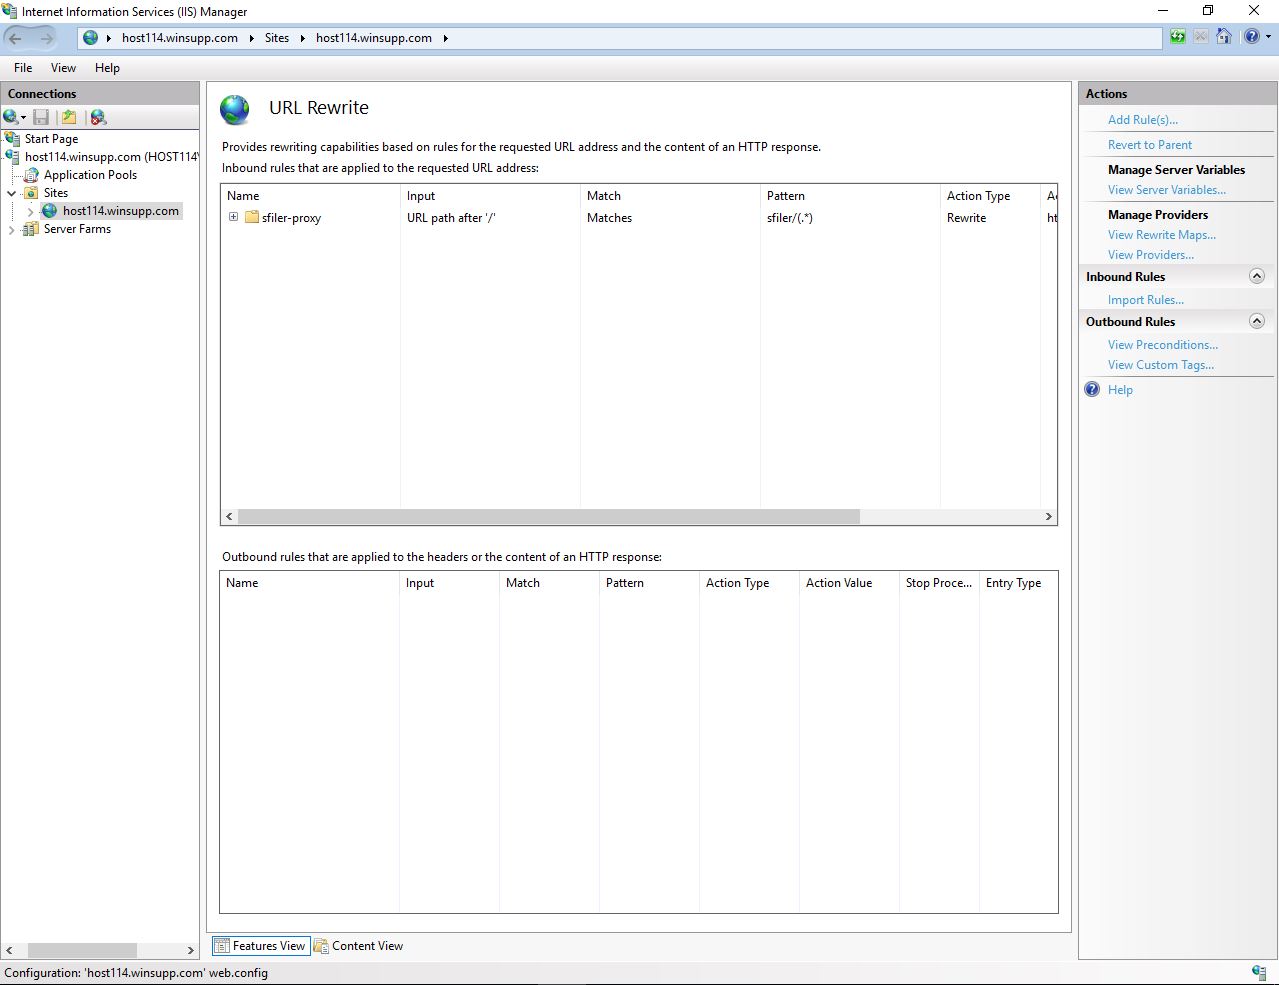
Now we are ready to test the S-Filer Portal application.
The S-Filer gateway service must be restarted using Windows service.
IIS- Changing the MaxAllowedContentLength
You will need to change the maxAllowedContentLength setting in IIS to be able to transfer large files. The default value is 30000000 bytes, which is approximately 28.6MB, so with this value you will not be able to transfer files larger than 29 MB. The following shows how to change this value in IIS to be able to transfer lager files.
To change this, open IIS Admin, click on the Sites and Your Web Site.
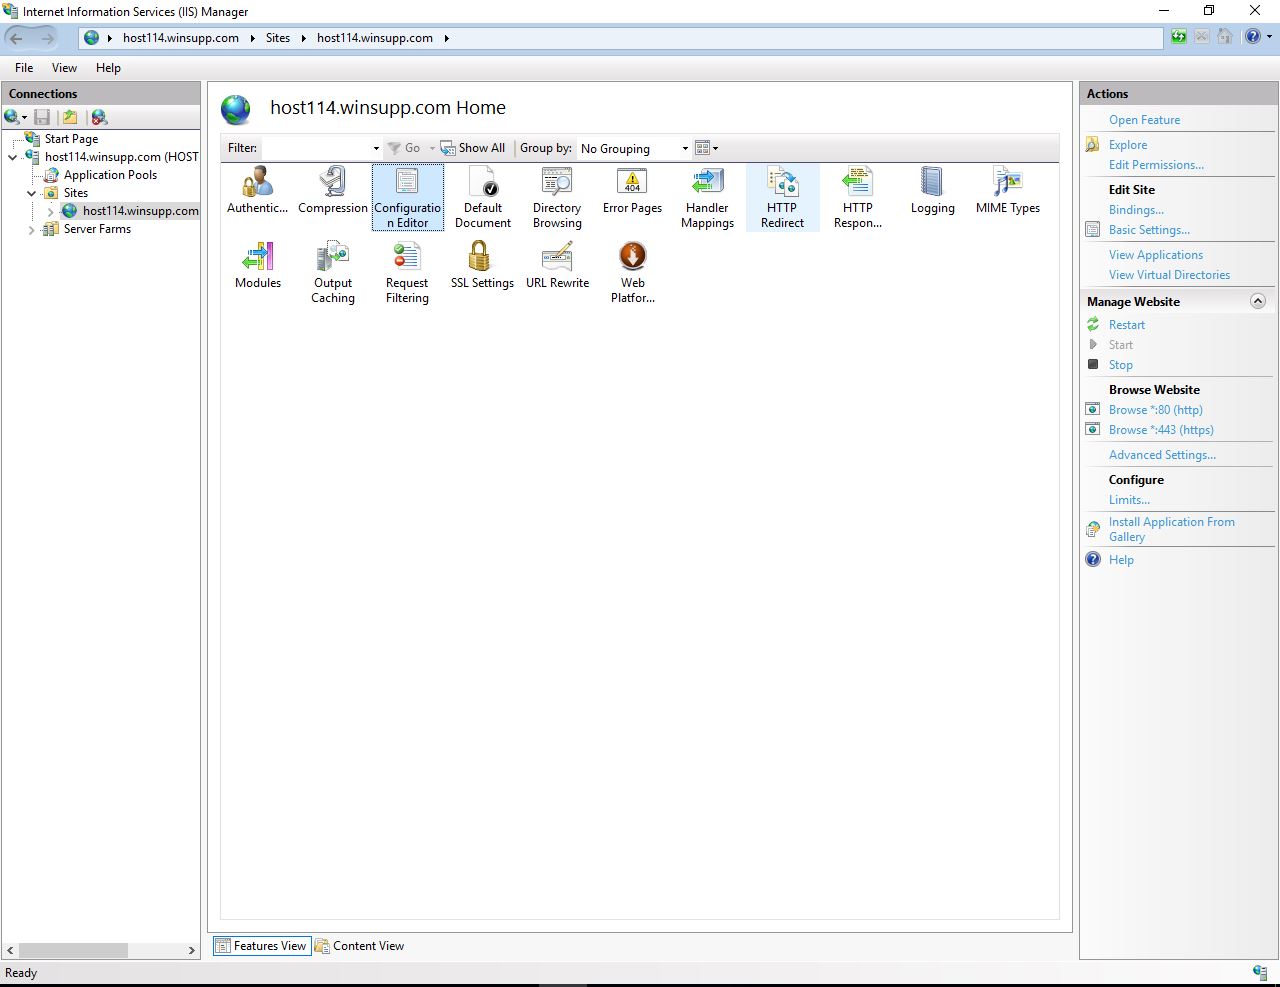
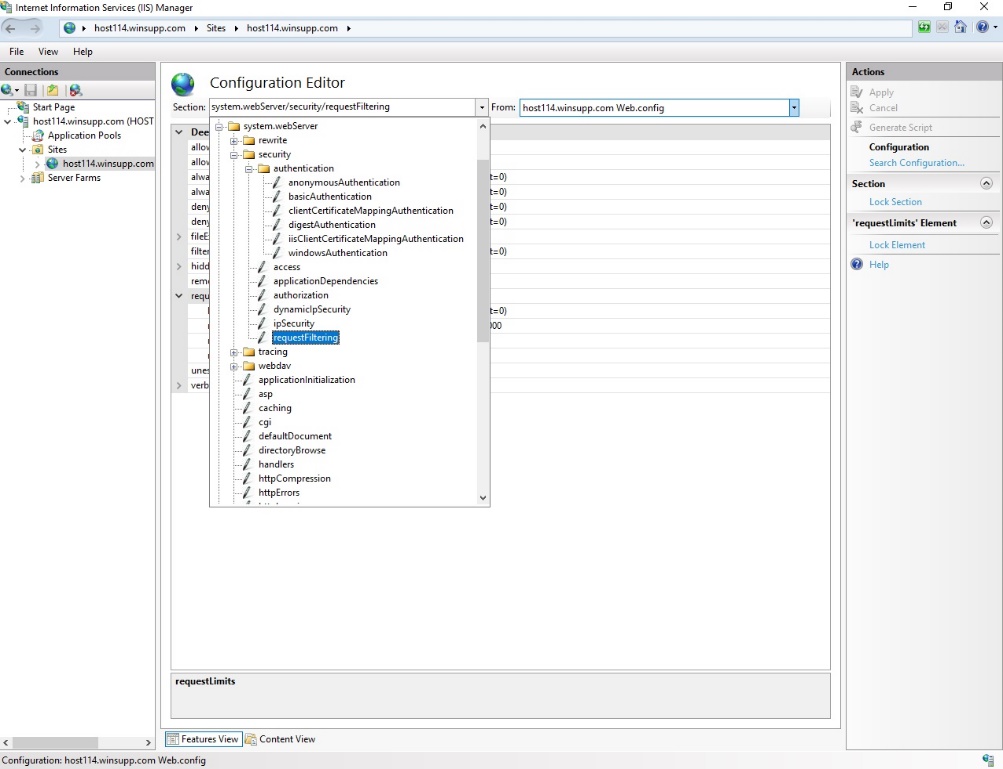
Double click Configuration Editor scroll down to system.webServer -- security -- requestFiltering
Expand "requestLimits" and edit the maxAllowedContentLength setting to the desired level. The default value is 30000000 bytes, which is approximately 28.6MB. Change the setting to your desired amount. IIS 7.5 has a max size of 2GB (2147483648 bytes) and IIS 8.5 and 10.0 has a max size of 4GB (4294967295 bytes).
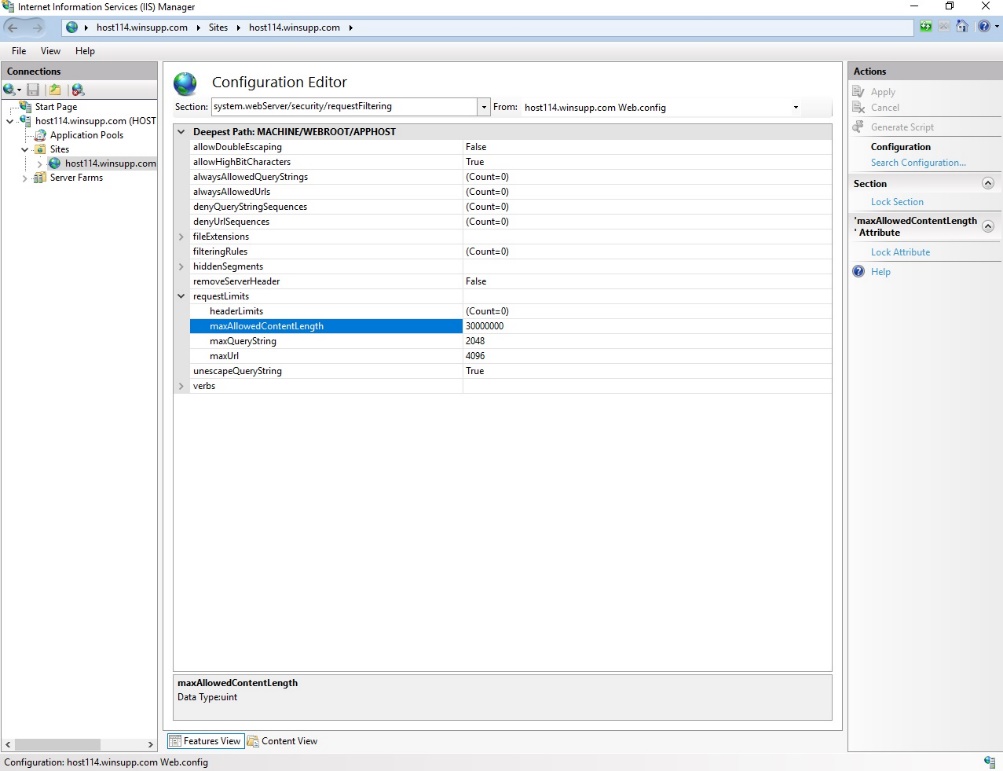
Restart IIS to apply the changes.
Performance tuning configuration
The following parameters can be changed to tune the performance characteristics of S-Filer.
| Configuration key | Location | Description | Default value |
|---|---|---|---|
| wrapper.java.initmemory | File: conf/wrapper.conf | Defines the amount of memory used by Java when starting. The value is in MB. | 256 |
| wrapper.java.maxmemory | File: conf/wrapper.conf | Defines the maximum amount of memory used by the java application. This value should be increased to handle more requests concurrently. The server will use from 512 Mb to 1 Gb of memory for its basic processes. Most requests will require 1 to 2 MB of memory to be handled. A value of 4 Gb should be able to handle close to 1000 concurrent requests. Reports require a lot more memory, when generating large reports, it may be necessary to increase the memory. | 512 |
| Receive Timeout | Administrative Console > [Server Name] > Configuration > Tab: Advanced Configurations | The number of milliseconds that the server will wait on a socket before receiving a response when it connects to any system. | 30000 (30 seconds) |
| Inactivity timeout | Administrative Console > [Server Name] > Configuration > Tab: Advanced Configurations | Number of seconds before a user session times out. If a user does not make a request within this time, its authentication token will be invalidated. Note that ideally, this should be at least as long as the session timeout in the web interface to ensure a pleasant user experience. | 1800(30 minutes) |
| Timeout | Administrative Console > [Server Name] > Configuration > Tab: Administrative Console | Not currently used | 30000 |
Accessing the S-Filer portal
If you are working locally, you can access the user interface at this address: https://gateway-host:8081/sfiler/
- username: sfiler-master
- password: sfiler
Configuration manager
Does not require extra file system modification to function.
S-Filer Portal Web Interface
For S-Filer Portal's web interface to function, it is mandatory to prepare a location for its configuration file and to set an environment variable configured with the path to reach this file.
The environment variable to set is called: SFILER_WEB_CONFIG_PATH
Its content must be the path to the configuration file, ex: C:\MyPath\conf\gui.conf
The file to use will be created and managed by the configuration manager in the instance of the S-Filer Portal's Web Interface. A web interface instance creation will generate this file. If you make modifications to the instance in the configuration manager, this file may be updated depending on what you have changed.
Updates
Windows
The Server
It's possible to update an existing instance of S-Filer Server. This can be useful to add the newest features of S-Filer to your existing product while keeping your current configuration intact.
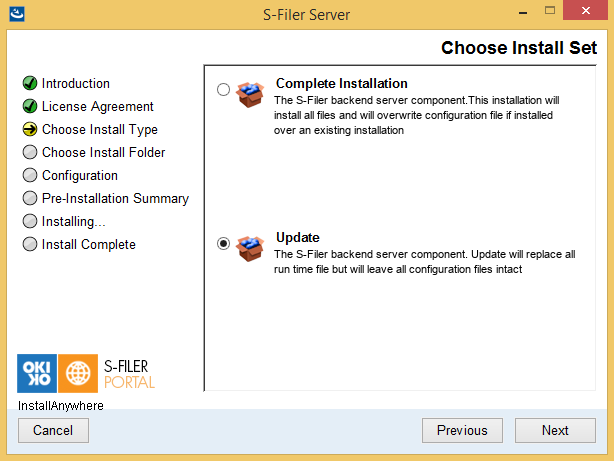
First, launch the installer. After you have read and accepted the license, you must select the installation type. Please select "Update".
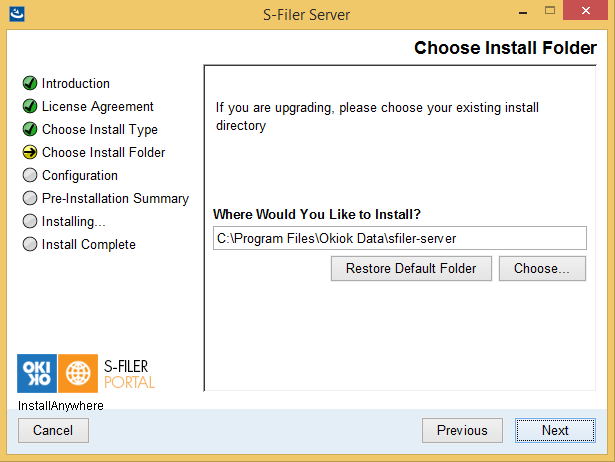
Then, you are prompted to enter your existing installation directory. The Updater validates that the installation path provided contains an S-Filer instance and prevents the user from proceeding if a wrong path is specified.
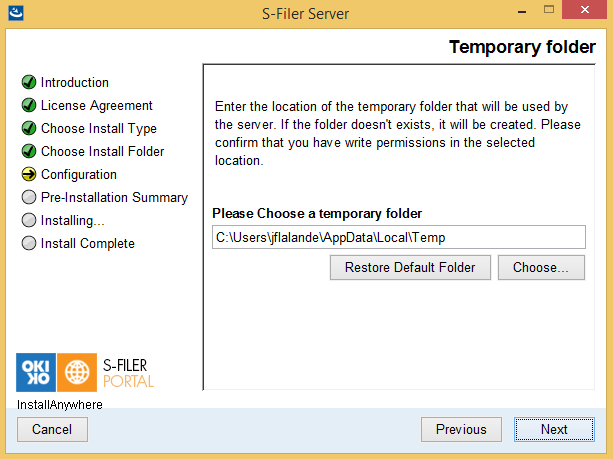
After selecting your existing installation, you must choose a new temporary folder that will be used by the server. If the folder does not exist, it will be created during the installation. Make sure that you have write permission on the selected location.
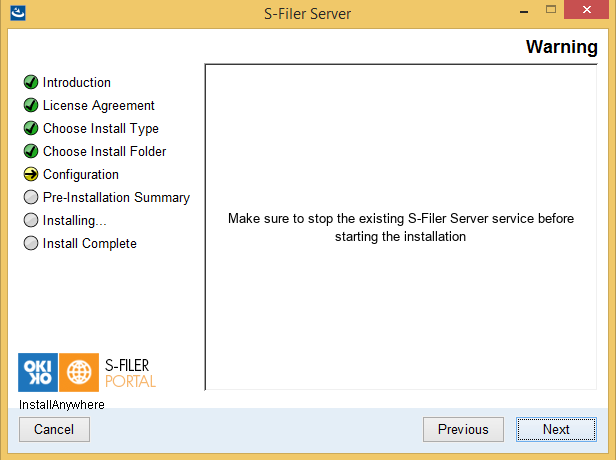
Before the update begins, you will be prompted to stop your existing S-Filer service before proceeding with the installation. Although the Updater will try to stop it by itself, it is safer if the user does it himself. Updating over a running service may cause the installation to fail.
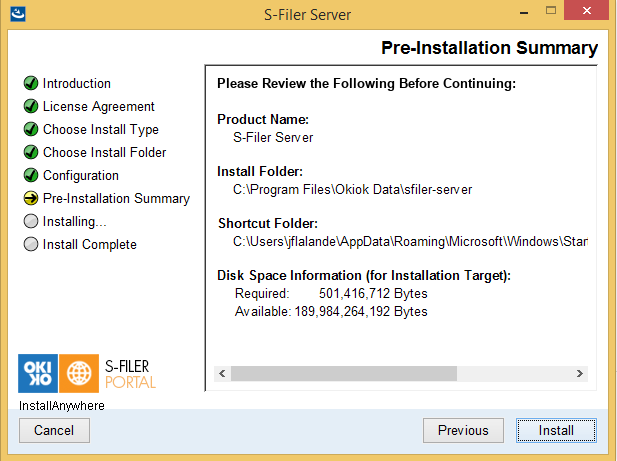
Finally, you must validate the parameters of the install before it starts copying files to the target system. If the parameters are valid, click the Install button to continue the installation. Make sure you have write access to your install directory and all its content. If the Updater is unable to install files to your install folder because of denied permission, the installation will abort.
After every update run the following command before starting the S-Filer server to be sure if there are schema updates, they will be done. If you forget to run the following command and there are schema updates when you login to the admin console you will get a message that the database schema needs to be updated.
sfiler-config-cli.bat -l db_user_name -p *db_password* update-db-schemaOnce the update is done, restart your service via the service manager. If you are using customized mail template, your pre-installation template will be backed-up in your install directory under /server/etc/mail.backup.
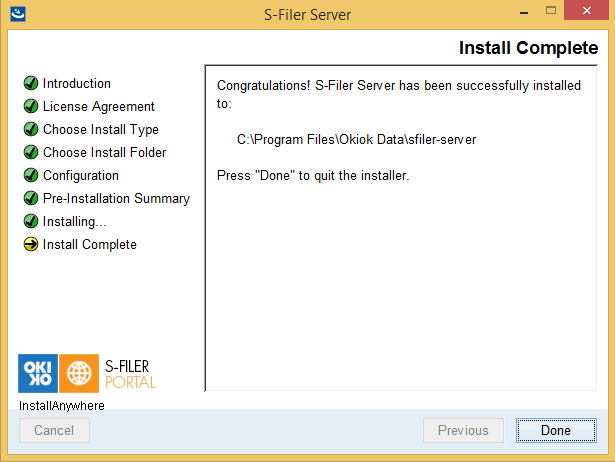
The Gateway
It is possible to update an existing instance of S-Filer Gateway. This can be used to add the newest feature of S-Filer to your existing product while keeping your current configuration intact.
First, launch the installer. After you have read and accepted the license, you must select the installation type. Please select "Update".
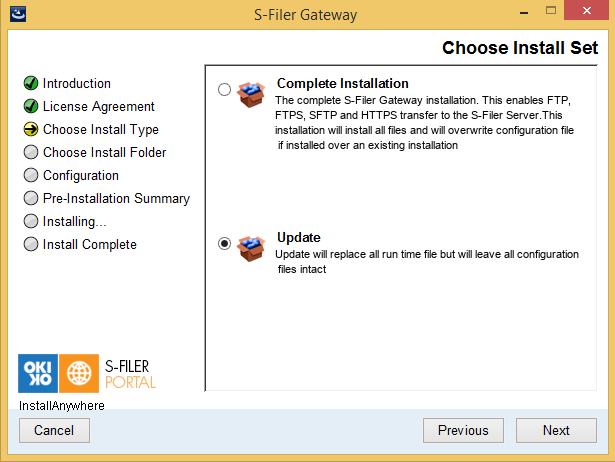
Then, you are prompted to enter your existing installation directory. The Updater validates that the installation path provided contains an S-Filer instance and prevents the user from proceeding if a wrong path is specified.
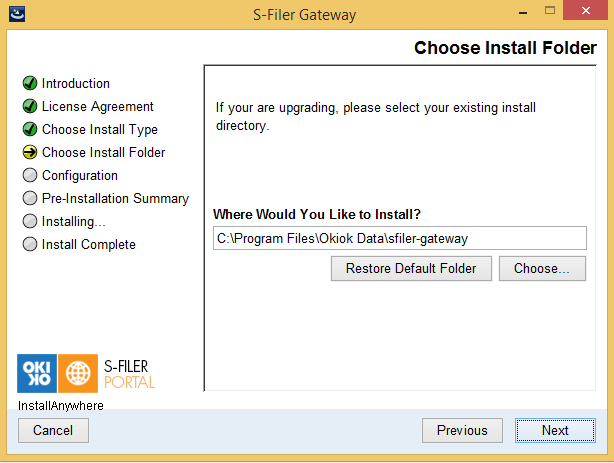
After selecting your existing installation, you must choose a new temporary folder that will be used by the gateway. If the folder does not exist, it will be created during the installation. Make sure that you have write permission on the selected location.
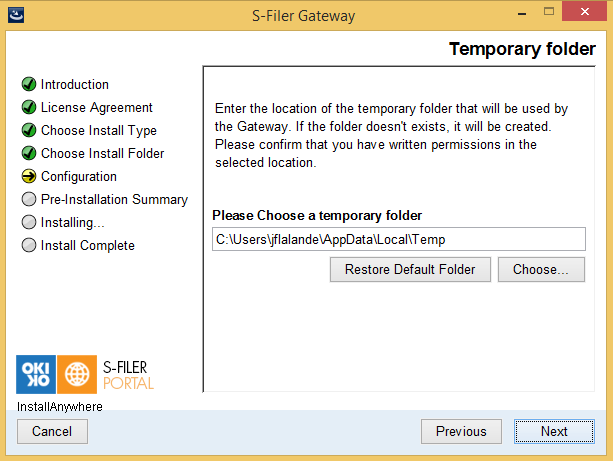
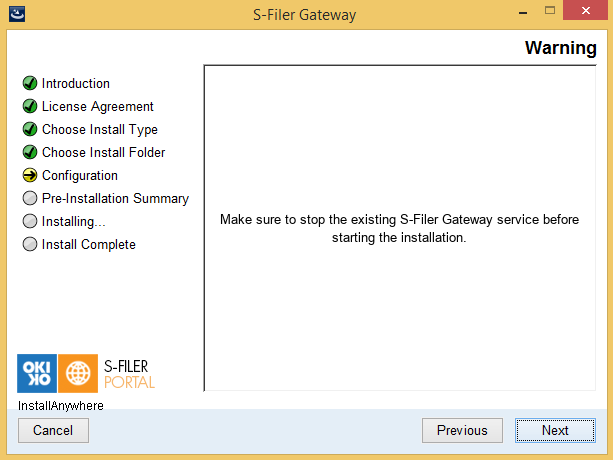
Before the update begins, you will be prompted to stop you existing S-Filer service before proceeding with the installation. Although the Updater will try to stop it by itself, it is safer if the user does it himself. Updating over a running service may cause the installation to fail.
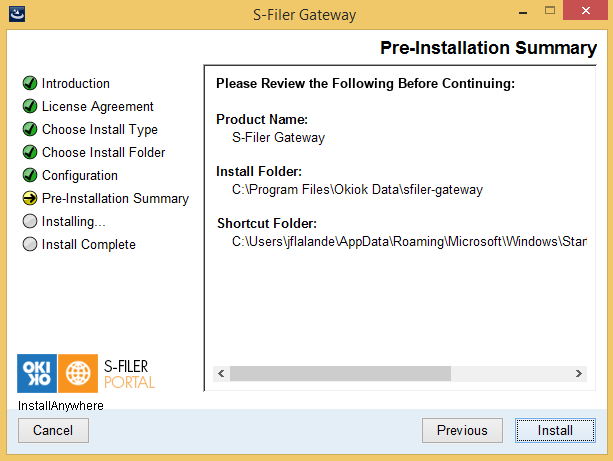
Finally, you must validate the parameters of the installer before it starts copying files to the target system. If the parameters are valid, click the Install button to continue the installation. Make sure that you have write access to your install directory and all its content. If the Updater is unable to install files to your install folder because of denied permission, the installation will abort.
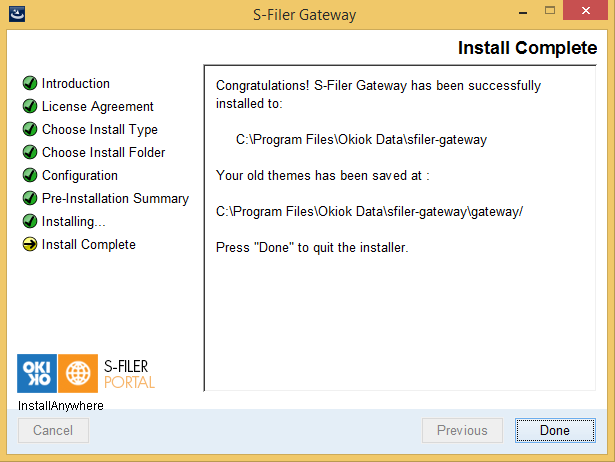
Once the update is done, restart your service via the service manager.
Restoring the customer graphical theme
When the Gateway is updated, its webapps folder is replaced by the new version. Any customer-specific graphical theme you had installed is not lost: the previous webapps folder is backed up on the Gateway under .../sfiler-gateway/gateway/webapps.backup.
To restore your theme after the update, copy your customer theme folder from .../sfiler-gateway/gateway/webapps.backup/sfiler-gui-ajax/themes back into the new .../sfiler-gateway/gateway/webapps/sfiler-gui-ajax/themes directory, then restart the Gateway service so that the customer theme is served again.
See Also
For details on building and customizing a theme, see the Customization Guide.
Linux
The Server
To launch the update, run the sfiler-server-installer.bin. Make sure you have proper permissions on the executable file. If this is not the case, run the following command:
chmod 755 sfiler-server-installer.binOnce the rights to the file are appropriate, start the installation directly from the command line:
./sfiler-server-installer.binThe first step of the installer prompts you to choose the language.
[root@localhost tmp]# ./sfiler-server-installer.bin

Preparing to install
Extracting the JRE from the installer archive...
Unpacking the JRE...
Extracting the installation resources from the installer archive...
Configuring the installer for this system's environment...

Launching installer...

===============================================================================

Choose Locale...
----------------


->1- English
  2- Español
  3- Français

CHOOSE LOCALE BY NUMBER:
After accepting the license, you are prompted for the installation type of the server. Please select "Update".
DO YOU ACCEPT THE TERMS OF THIS LICENSE AGREEMENT? (Y/N): Y

===============================================================================
Choose Install Set
------------------

Please choose the Install Set to be installed by this installer.

->1- Complete Installation
  2- Update

ENTER THE NUMBER FOR THE INSTALL SET, OR PRESS \<ENTER\> TO ACCEPT THE
DEFAULT

  : 2
Next, you are prompted for the installation directory of the server. Please enter your existing S-Filer product directory. If the directory specified is wrong, the Updater won't be able to proceed with the update.
===============================================================================
Choose Install Folder
---------------------

If you are upgrading, please choose your existing install directory
Where would you like to install?

  Default Install Folder: /usr/local/sfiler-server

ENTER AN ABSOLUTE PATH, OR PRESS <ENTER> TO ACCEPT THE DEFAULT

  :
You must now choose a new temporary folder that will be used the server. If the folder does not exist, it will be created during the installation. Make sure that you have write permission on the selected location.
===============================================================================
Temporary folder
----------------


Enter the location of the temporary folder that will be used by the
server. If the folder doesn't exist, it will be created. Please confirm that you
have write permissions in the selected location.

Please Choose a temporary folder (Default: /tmp):
Next, please stop your existing S-Filer Server if it is running. Although the Updater will try to stop it by itself in the install process, it is safer if the user does it himself. Updating over a running service may cause the installation to fail. Also, make sure that you have write access to your install directory and all its content. If the Updater is unable to install files to your install folder because of denied permission, the installation will abort.
===============================================================================
Warning
-------

Make sure to stop the existing S-Filer Server service before starting
the nstallation

PRESS <ENTER> TO CONTINUE:
===============================================================================
Pre-Installation Summary
------------------------


Please Review the Following Before Continuing:

Product Name:
    S-Filer Server

Install Folder:
    /usr/local/sfiler-server

Link Folder:
    /root

Disk Space Information (for Installation Target):
    Required: 514,199,965 Bytes
    Available: 29,649,932,288 Bytes

PRESS <ENTER> TO CONTINUE:
Finally, if the install parameters are correct, press ENTER to complete the update of the S-Filer Portal Server.
===============================================================================
Ready To Install
----------------

InstallAnywhere is now ready to install S-Filer Server onto your system
at the following location:

/usr/local/sfiler-server

PRESS <ENTER> TO INSTALL:
One can then follow the installation progress.
Installing...
-------------

[==================|==================|==================|==============
[------------------|------------------|------------------|------------
The last step confirms that the installation was successful. In case of problems, please contact support. If you are using customize mail template, your pre-installation template will be backed-up in your install directory under /server/etc/mail.backup.
===============================================================================
Installation Complete
---------------------

Congratulations. S-Filer Server has been successfully installed to:

    /usr/local/sfiler-server

PRESS <ENTER> TO EXIT THE INSTALLER:
After every update run the following command before starting the S-Filer server to be sure if there are schema updates, they will be done. If you forget to run the following command and there are schema updates when you login to the admin console you will get a message that the database schema needs to be updated.
sfiler-config-cli.sh -l db_user_name -p *db_password* update-db-schemaAll S-Filer Portal Configurations can be modified through the configuration CLI.
See the Gateway Configuration CLI Options manual.
The Gateway
To launch the update, run the sfiler-gateway-installer.bin. Make sure you have proper permissions on the executable file. If this is not the case, run the following command:
chmod 755 sfiler-gateway-installer.binOnce the rights to the file are appropriate, start the installation directly from the command line:
./sfiler-gateway-installer.binThe first step of the installer prompts you to choose the language.
[root@localhost tmp]# ./sfiler-gateway-installer.bin

Preparing to install
Extracting the JRE from the installer archive...
Unpacking the JRE...
Extracting the installation resources from the installer archive...
Configuring the installer for this system's environment...

Launching installer...

===============================================================================
Choose Locale...
----------------

->1- English
  2- Español
  3- Français

CHOOSE LOCALE BY NUMBER:
After accepting the license, you are prompted for the installation type of the server. Please select "Update".
DO YOU ACCEPT THE TERMS OF THIS LICENSE AGREEMENT? (Y/N): Y

===============================================================================

Choose Install Set
------------------

Please choose the Install Set to be installed by this installer.

->1- Complete Installation
  2- Update

ENTER THE NUMBER FOR THE INSTALL SET, OR PRESS <ENTER> TO ACCEPT THE
DEFAULT

  : 2
Next, you are prompted for the installation directory of the gateway. Please enter your existing S-Filer product directory. If the directory specified is wrong, the Updater won't be able to proceed with the update.
===============================================================================
Choose Install Folder
---------------------

If you are upgrading, select the existing install directory.

Where would you like to install?

    Default Install Folder: /usr/local/sfiler-gateway

ENTER AN ABSOLUTE PATH, OR PRESS <ENTER> TO ACCEPT THE DEFAULT

    :
You must now choose a new temporary folder that will be used by the gateway. If the folder does not exist, it will be created during the installation. Make sure that you have write permission on the selected location.
===============================================================================
Temporary folder
----------------

Enter the location of the temporary folder that will be used by the
Gateway. If the folder doesn't exist, it will be created. Please confirm that you
have written permissions in the selected location.

Please Choose a temporary folder (DEFAULT: /tmp):
Next, please stop your existing S-Filer Gateway if it is running. Although the Updater will try to stop it by itself in the install process, it is safer if the user does it himself. Updating over a running service may cause the installation to fail. Also, make sure that you write access to your install directory and all its content. If the Updater is unable to install files to your install folder because of denied permission, the installation will abort.
===============================================================================
Warning
-------

Make sure to stop the existing S-Filer Gateway service before starting
the installation.

PRESS <ENTER> TO CONTINUE:

===============================================================================

Pre-Installation Summary
------------------------

Please Review the Following Before Continuing:

Product Name:
    S-Filer Gateway

Install Folder:
    /usr/local/sfiler-gateway

Link Folder:
    /root

Disk Space Information (for Installation Target):
    Required: 447,080,253 Bytes
    Available: 30,207,270,912 Bytes

PRESS <ENTER> TO CONTINUE:
Finally, if the install parameters are correct, press ENTER to complete the update of the S-Filer Portal Gateway.
===============================================================================

Ready To Install
----------------

InstallAnywhere is now ready to install S-Filer Gateway onto your system
at the following location:

    /usr/local/sfiler-gateway

PRESS <ENTER> TO INSTALL:
One can then follow the installation progress.
Installing...
-------------

[==================|==================|==================|==============
[------------------|------------------|------------------|------------
The last step confirms that the installation was successful. In case of problems, please contact support. If you are using a customize theme, it has been saved under .../sfiler-gateway/gateway/webapps.backup
===============================================================================
Installation Complete
----------------

Congratulations. S-Filer Gateway has been successfully installed to:
    /usr/local/sfiler-gateway

Your old themes has been saved at:
    /usr/local/sfiler-gateway/gateway/

PRESS <ENTER> TO EXIT THE INSTALLER:
Restoring the customer graphical theme
When the Gateway is updated, its webapps folder is replaced by the new version. Any customer-specific graphical theme you had installed is not lost: the previous webapps folder is backed up on the Gateway under .../sfiler-gateway/gateway/webapps.backup.
To restore your theme after the update, copy your customer theme folder from .../sfiler-gateway/gateway/webapps.backup/sfiler-gui-ajax/themes back into the new .../sfiler-gateway/gateway/webapps/sfiler-gui-ajax/themes directory, then restart the Gateway service so that the customer theme is served again.
See Also
For details on building and customizing a theme, see the Customization Guide.
Uninstalling
Windows
The Server
Uninstalling the server is done by running the executable from the command line console or from the appropriate menu in the Windows graphics facilities. In both cases, the uninstaller will remove the server component but may not destroy all files (such as temporary files and log files). You may have to manually remove these files.
On Windows, use the utility to add or remove programs. This utility is accessible from the Control Panel. It is very important to stop the S-Filer Portal server before starting the uninstall process.
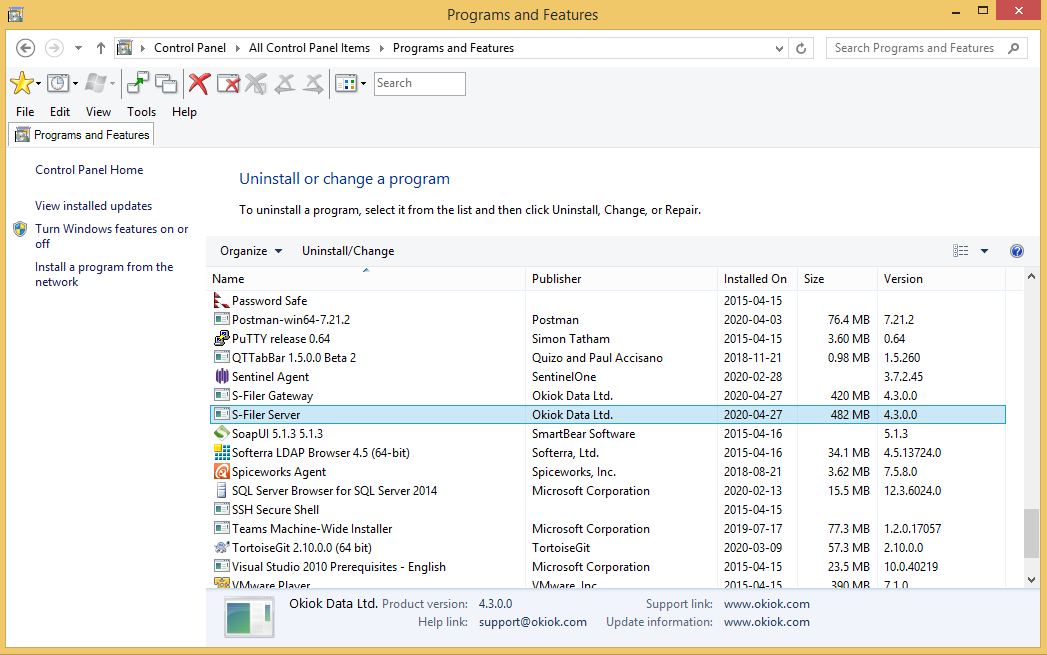
Select S-Filer Server click the Uninstall/Change button.
You will then be prompted to confirm the uninstallation.
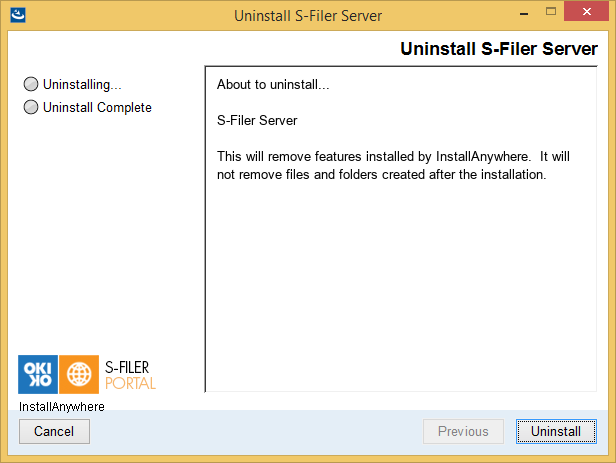
At the end of the Server uninstall process, it is possible some files were not deleted. It will be necessary to manually delete these files.
Once removed, you may be requested to reboot.
The Gateway
For the Windows environment, use the utility to add or remove programs. This utility is accessible from the Control Panel. It is very important to stop the S-Filer Portal Gateway before starting the uninstall process or else it is possible that the uninstall process fails because some files in use cannot be removed successfully.
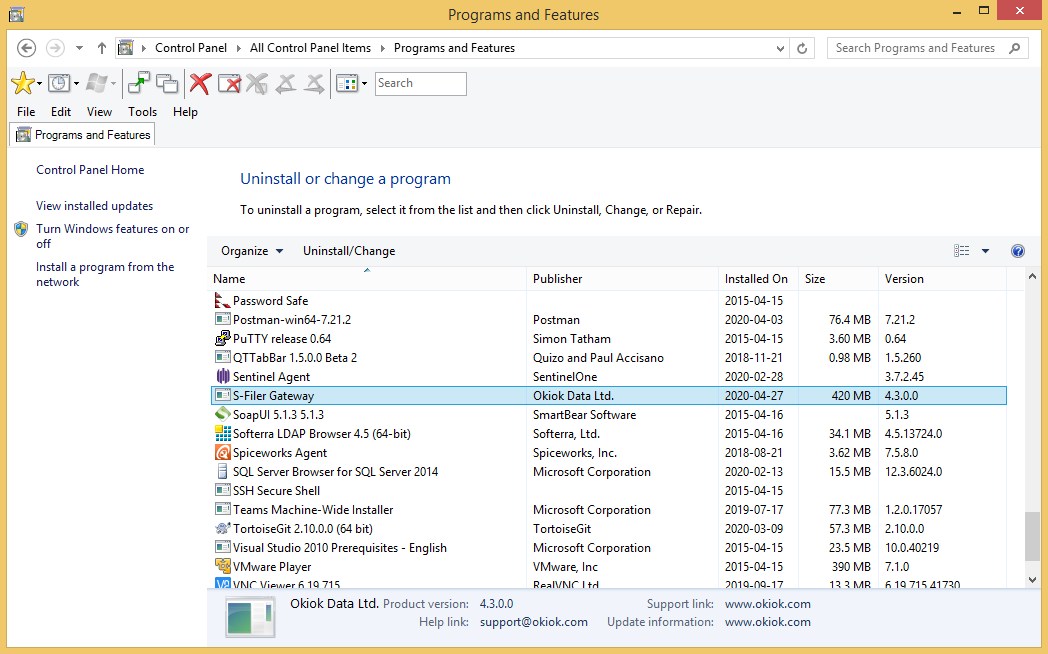
Select the S-Filer Gateway program and click the Uninstall/Change button.
You will then be prompted to confirm the uninstalling process of the Gateway.
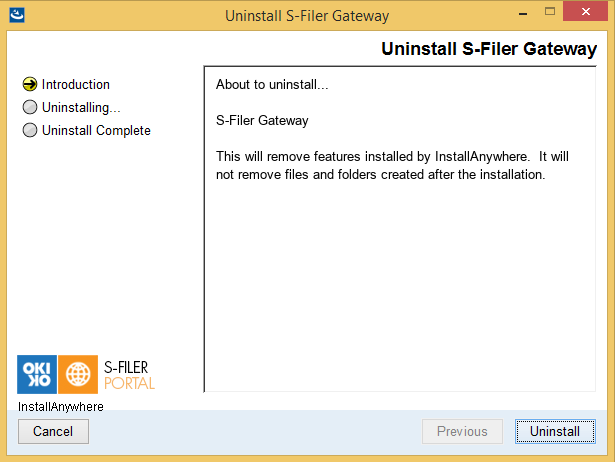
At the end of the Gateway uninstall process, it is possible some files were not deleted. It will be necessary to manually delete these files.
The command line interface (CLI)
Uninstalling the CLI is done by running the executable from the command line console or from the appropriate menu in the Windows graphics facilities. In both cases, the uninstaller will remove the CLI component but may not destroy all files (such as temporary files and log files). You may have to manually remove these files.
On Windows, use the utility to add or remove programs. This utility is accessible from the Control Panel.
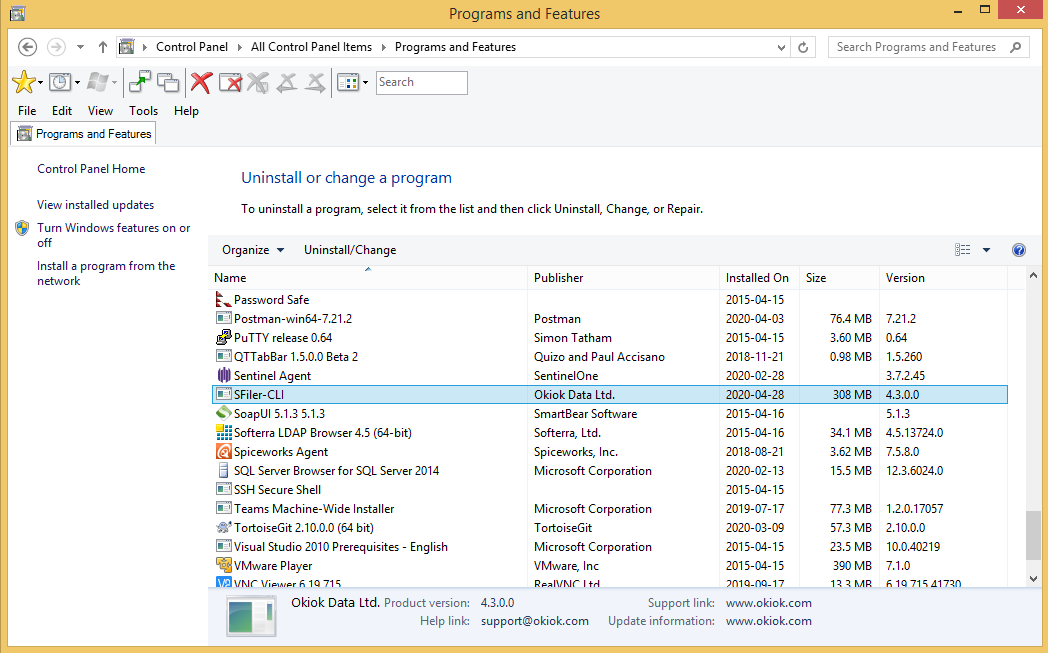
Select SFiler-CLI click the Uninstall/Change button.
You will then be prompted to confirm the uninstallation.
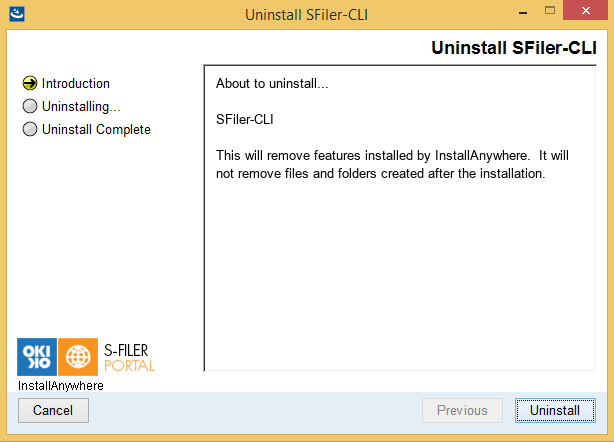
At the end of the CLI uninstall process, it is possible some files were not deleted. It will be necessary to manually delete these files.
Linux
The Server
Uninstalling the S-Filer Portal server on UNIX requires launching the uninstall utility in the command line. Make sure you have the needed access rights on:
./Uninstall S-Filer ServerYou will be prompted to confirm uninstall. Press ENTER to confirm. You may get an error message showing that not all files were removed simply use the following command to remove these:
rm --rf sfiler-serverThe Gateway
Uninstalling the S-Filer Portal server on Unix requires launching the uninstall utility in the command line. Make sure you have the needed access rights on:
./Uninstall_S-Filer GatewayYou will be prompted to confirm uninstall. Press ENTER to confirm. You may get an error message showing that not all files were removed simply use the following command to remove these.
rm --rf sfiler-gatewayOnce this step is completed, all components of the S-Filer Portal Gateway will be deleted.
The command line interface (CLI)
Uninstalling the CLI on UNIX requires launching the uninstall utility in the command line. Make sure you have the needed access rights on:
./Uninstall SFiler-CLIYou will be prompted to confirm uninstall. Press ENTER to confirm. You may get an error message showing that not all files were removed simply use the following command to remove these:
rm --rf SFiler-CLICommand line interface arguments
Usage: sfiler [options] [command] [command options]
    Options:
        -h, --help
            Display this help screen
            Default: false
        -N
            No SSL Warning. Do not warn if the server address does not use SSL.
            Default: false
        -l
            The username to use to perform the action (ex: user@domain)
        -np
            Do not prompt. Never prompt for information.
            Default: false
        -op
            The obfuscated (hidden) password to authenticate
        -p
            The password to authenticate
        -q
            Be quiet (less output on screen)
            Default: false
        -s
            The URL of the server to use. (Ex: https://[PUBLIC ADDRESS]/sfiler/server/
            or https://[internal address]:8088/)
        -sso
            Authenticate using a Kerberos token. This is a transparent
            authentication.
            Default: false
        -ui
            User impersonation. When listing, erasing or downloading files, this
            options allows the path to resolve as if the impersonated user was
            logged in.
        -v
            Verbose (more output on screen)
            Default: false
    Commands:
        delete  Delete a file or folder
            Usage: delete [options] The path of the file or folder to delete. (ex:
            /Inbox/folder1/test.txt)
        download Download a file
            Usage: download [options] The path of the file to download. (ex:
            /Inbox/folder1/test.txt)
                Options:
                    -V
                        (Optional) The version number of the file to retrieve, if omitted,
                        retrieves the latest version.
                    -a
                        Save As. The name to use when saving the file on disk. Default:
                        Original filename from server.
                    -o
                        Overwrite the file on disk without asking.
                        Default: false
        hide-password Obfuscate (encode) a password so that it can be written in
        a file and not be easily recovered.
            Usage: hide-password [options]
        list List files and folders
            Usage: list [options] The path of the folder to list. (ex:
            /Inbox/folder1)
        list-versions List versions of a file
            Usage: list-versions [options] The path of the file to list. (ex:
            /Inbox/folder1/test.txt)
        mkdir Create folders
            Usage: mkdir [options] <folder_to_create>
        move Move/rename a remote file or folder
            Usage: move [options] <source_path> <destination_path>. If the
            destination path starts with a '/', it is absolute, otherwise it is
            considered relative to the source path.
        send-email Send a file securely to an email address
            Usage: send-email [options] Files to upload
                Options:
                    * -r
                        Comma separated list of email addresses to which the files will be
                        sent.
                    -t
                        Specify a theme to override the default notification theme.
                    -tc
                        Default: 0
                    -td
                        Set an absolute expiration date. After this date, the file cannot
                        be downloaded, it will be deleted. (ex: 2011-12-31)
                    -th
                        Set a relative expiration date. The file will expire in X hours
                        from now. (ex: 2)
                        Default: 0
                    -wp
                        Password to protect the files. You must communicate this password
                        to recipients so they can download the files.
                    -x
                        Message to send to recipients
        send-recipients Send a file only to some recipients of a community
            Usage: send-recipients [options] Files to upload
                Options:
                    * -c
                        The community from which the recipients are selected. You can get
                        the community names by listing the root.
                    -f
                        Wait for all post-processing tasks to be completed before the
                        command ends.
                        Default: false
                    -m
                        The default domain name for recipients. Recipients can use the
                        @domain notation to override this setting.
                    * -r
                        Comma separated list of usernames which will receive the file.
                        These users must be members of the community.
                    -t
                        Override the notification theme to use.
                    -tc
                        Default: 0
                    -td
                        Set an absolute expiration date. After this date, the file cannot
                        be downloaded, it will be deleted. (ex: 2011-12-31)
                    -th
                        Set a relative expiration date. The file will expire in X hours
                        from now. (ex: 2)
                        Default: 0
                    -x
                        Message to send to recipients
        upload Upload a file
            Usage: upload [options] Files to upload
                Options:
                    * -d
                        Upload destination. This is the path where we should upload the
                        file. (ex: /Inbox/folder1)
                    -f
                        Wait for all post-processing tasks to be completed before the
                        command ends.
                        Default: false
                    -t
                        Override the notification theme to use.
                    -tc
                        Default: 0
                    -td
                        Set an absolute expiration date. After this date, the file cannot
                        be downloaded, it will be deleted. (ex: 2011-12-31)
                    -th
                        Set a relative expiration date. The file will expire in X hours
                        from now. (ex: 2)
                        Default: 0
                    -x
                        Message to send to recipients
Annexe 1 - Installation and Integration CheckList
S-Filer Installation Reference Card
| Configuration | Default Value | Actual Value (Instance 1) | Actual Value (Instance 2) |
|---|---|---|---|
| SERVER | |||
| Address | localhost | ||
| Administrative Console port | 8080 | ||
| Administrative Console URL | http(s)://localhost:8090/ | ||
| Web services port | 8088 | ||
| Web services URL | http(s)://localhost:8088/ | ||
| Email server | localhost | ||
| Email port | 25 | ||
| GATEWAY | |||
| Address | localhost | ||
| Web server port | 8081 | ||
| FTP port | 21 | ||
| FTPS (explicit) port | 990 | ||
| FTP data port | 60000-60020 | ||
| SFTP port | 22 | ||
| GUI | |||
| Address | localhost | ||
| Port | 8081 | ||
| Context | /sfiler | ||
| GUI URL | http(s)://localhost:8081/sfiler | ||
| Server Proxy | http(s)://localhost:8081/sfiler/server | /server | /server |
| APACHE REVERSE PROXY | |||
| Address | localhost | ||
| Port | 443 | ||
| IIS REVERSE PROXY | |||
| Address | localhost | ||
| Port | 443 |